
Building packages has been one of the major functions of a CNC Administrator since the beginning of JD Edwards OneWorld, now known as EnterpriseOne. Since its humble beginnings, the package build process has been refined and improved to the point where it is reliably executed by CNCs on systems every day, sometimes multiple times per day.
With Tools Release 9.2.5, Oracle provided the ability to run the package lifecycle process from beginning to end (package assembly, package build, and package deployment) using web applications. Previously, these functions were only available using a development client or the Deployment Server. This enhancement provides the opportunity to automate and schedule package builds and deployments.
The key to this new functionality is a new JD Edwards B9 Client Network service that runs on the Deployment Server and can be started and stopped using Server Manager. This service must be running to successfully build a client only or a client and server package. Server only packages can be built successfully without the service running.
The process to assemble, build, and deploy a package on the web is very similar to the process on a Development Client or Deployment Server:
1. Assemble the package using P9601W (Work with Packages)
- FastPath to P9601W
- Click
 to add a package
 - Define the package as you normally would
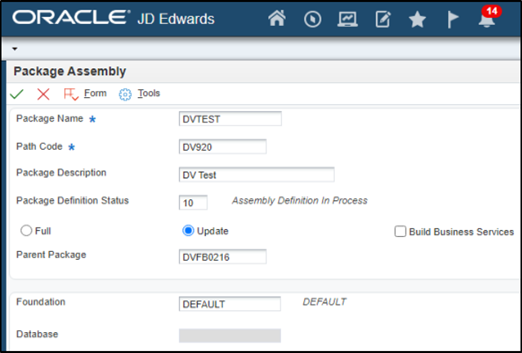
- Click
 to save the package assembly
 - Use Row → Object to get to the Object Component screen
- Find the object you wish to add to the package build on the right side of the screen and move it to the left side using

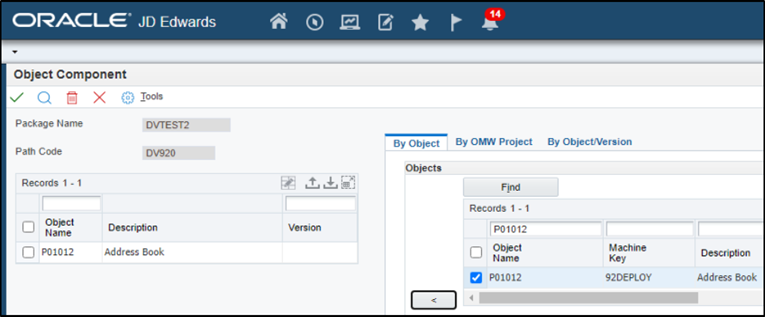
- Click to save the objects
- You will notice on the right side of the screen the [Individual Objects] tab is now active and can be used to review the objects in the package
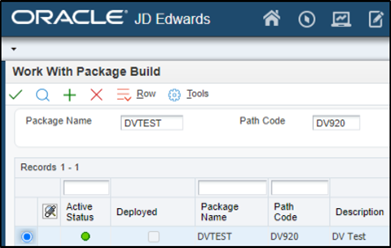
- Click the
 or use Row → Active/Inactive to Activate the package assembly

2. Define the package build
- Row → Define Build
- You are presented with the Package Build Revision screen in which you can change the default settings if you desire
- Click to save the build definition
- Click to save the Server Selection
- Click the or use Row → Active/Inactive to Activate the package build
3. Submit the package build
- Row → Submit Build
- Click on the Printer Selection screen
- Click
 to refresh the screen
 - You will see the Package Build Status in the lower portion of the screen:
- In Definition → Build Submitted → Build Completed
4. Deploy the package
- Be sure your package is selected and go to Row → Deployment
- Select the Client Workstation(s) and Enterprise Server(s) to which you wish to deploy
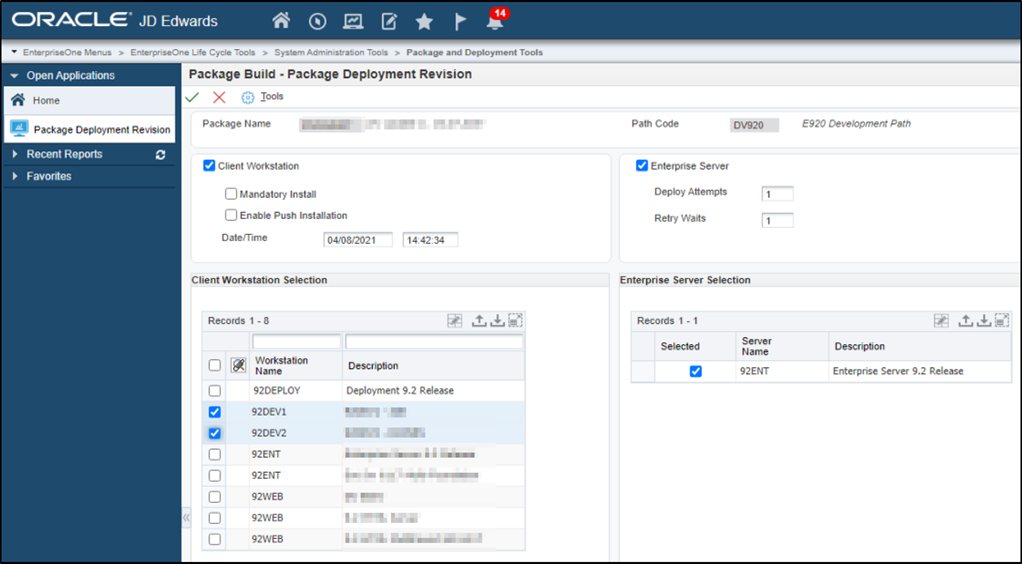
- Click to return to the Work with Packages Deployment screen
- Select the Enterprise Server at the bottom of the screen and click [Deploy] or click [Deploy ALL] to deploy to all Enterprise Servers with a status of “Approved”
More Information on this process can be found in Oracle’s JD Edwards Package Management Guide.
Bonus Feature #1
The web version of OMW (P98220W) has the ability to promote OMW Projects that have non-UDO objects. That means you can mix UDO objects with Tables, UBEs, APPs, BSFNs, etc. and promote them from P98220W.
Bonus Feature #2
With the capability to define, assemble, build, and deploy packages from the web client, you can also automate, schedule, and send notifications about package builds using orchestrations.
Continue to build your JD Edwards skills with Syntelligence. Our team of Oracle certified experts is dedicated to bringing you bi-weekly highlights and actionable tips. We look forward to learning with you and sharing our educational insights. Register today!
Syntax has over 40 years of Oracle ERP experience and over 20 years providing cloud and managed services for JD Edwards solutions. Contact us today to discover how we can help you maximize the value and performance of your mission-critical applications.