
Patching – it’s a necessary function to keep your applications running flawlessly as bugs reveal themselves in your EBS environment over time. However, despite its importance in maintaining a healthy system, the question is often asked, “what will this impact?”
Oracle E-Business Suite patches vary in size. Some may only be a few kilobytes and update a few files. Meanwhile, there are some that weigh in at over a gigabyte, potentially updating key components in multiple modules. How do we know what is going to be affected and where users should focus most of their attention for testing?
Setting Up the Backend
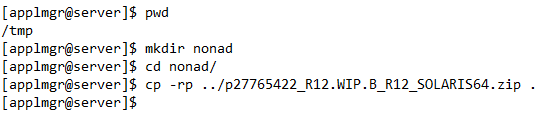
Has a patch been recommended by Oracle Support? Did you find a note in the Oracle Knowledge Base that looks like a fix for an issue you’ve been experiencing? Regardless of how the patch was found, the first thing you need to do is download the patch and stage it on your server. The stage directory can be anywhere that your application user has access. However, please note that Oracle requires that you separate patches belonging to the AD module from other patches. Thus, you will need to create two sub-directories under your stage location – “ad” and “nonad”. If your patch is for the AD module, place it under “ad”. If it is for any other module, it can go under “nonad”.
Setting Up the Frontend
To run the Patch Impact Analysis (PIA), you will need to log into the system under a user who has System Administrator privileges. Once inside E-Business Suite under System Administrator responsibility, navigate to “Oracle Applications Manager” à “Patching and Utilities”.

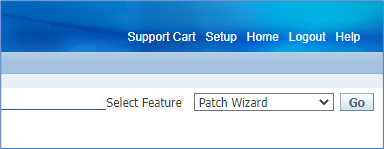
From here, look for a drop-down menu in the upper right-hand corner, select “Patch Wizard” (which is the feature that allows you to analyze the patch), then hit “Go”.
At this point, you’re on the Patch Wizard main page, which will serve as the hub from here on out. But first, there are a few setups that need to be confirmed. To set these, hit the Tasks icon in the “Patch Wizard Preferences” row.

From here, you will need to set all relevant preferences before running your analysis.
- Staging Directory: This will be the directory where you created the “ad” and “nonad” subdirectories. In our example above, we have set this to “/tmp”. Note that we are not specifying “ad” or “nonad” as that will be managed by Oracle.
- Merge Option Defaults: If you opt to use the Patch Wizard to download patches, you can choose if and how patches can be merged. Please note, valid Oracle Support credentials are required to accomplish this.
- Language and Platform Defaults: If you opt to use the Patch Wizard to download patches, you can select what language(s) and platform should be downloaded.
- In Use Products Defaults: If you opt to use the Patch Wizard for suggests, you can select this parameter to only get recommendations for products that are in use on your system.
- Display Option Defaults: You can opt to show or hide “Hidden Patches”, which are patches you choose not to display on the Recommended Patch Results Page (if using Patch Wizard for patch recommendations).
For our purposes, the most important setting is the Staging Directory. You will want to set this to a directory that you will be able to write to and our applmgr account will be able to read from. Once your preferences are selected, you are ready to proceed with the objective – to know what a particular patch will update on your instance!
For environments with network traffic open to communicate with Oracle Support, the Patch Wizard gives you the ability to set your credentials in EBS and have the patches downloaded automatically. This can be set after hitting the Tasks arrow for “Download Patches”.

For those running systems not open to the Internet or without direct access to Oracle Support, have no fear as this is not a requirement to analyze patches of interest! Simply download your patch(es) from Oracle Support and stage the file(s) under either the “ad” or “nonad” directories. Please note, only AD patches should go under “ad” – all other patches would fall under the “nonad” category.
Running the Analyzer
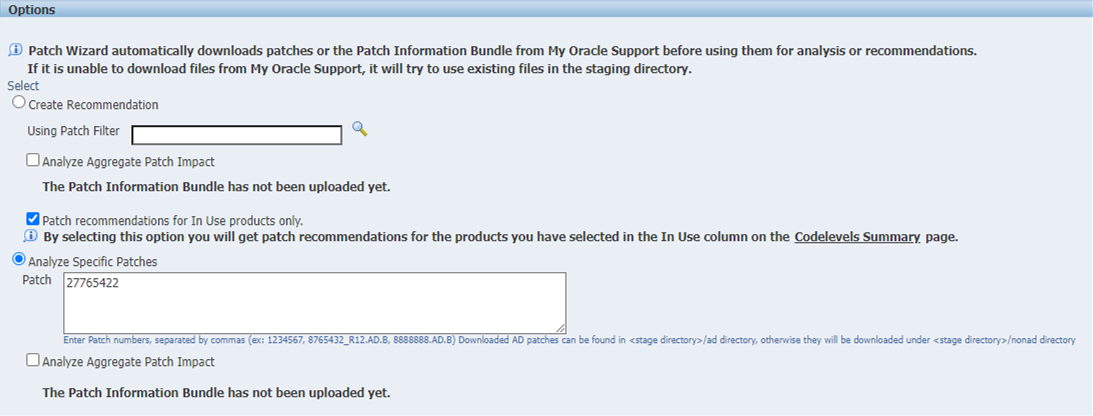
Now that your patch is staged, go to “Recommend/Analyze Patches”. From here, select the option to “Analyze Specific Patches” as you are looking to understand what a patch will update in your environment. Once selected, specify the patch number you just staged. Note, when analyzing multiple patches, you will have the ability to create a combined summary of the updated files with the “Analyze Aggregate Patch Impact” option.

On the same page, you will also be given the ability to schedule this analysis for a later time (if no time is specified, it’ll run ASAP) and whether or not to make this a recurring job. For our purposes today, we’ll run ASAP and “Never Repeat”. Once it’s all set, click “OK”. This will spawn a concurrent request that can be monitored by clicking the “Job Status” icon for “Recommend/Analyze Patches”. The request may run for a few minutes until its phase is marked as “Complete”.
Checking the Analyzer Output
Once complete, go back to the main Patch Wizard page and scroll down to the bottom. Here, you should see a “Recommended Patches Results” header with the patch you analyzed listed. Click the “Details” icon on the far right. Note, the warning status received in the example was for the patch not downloading from Oracle as we had manually staged it. As a result, the warning message was ignored. If you experience any warnings on your end, please review your logs to ensure your analysis completed without issue.

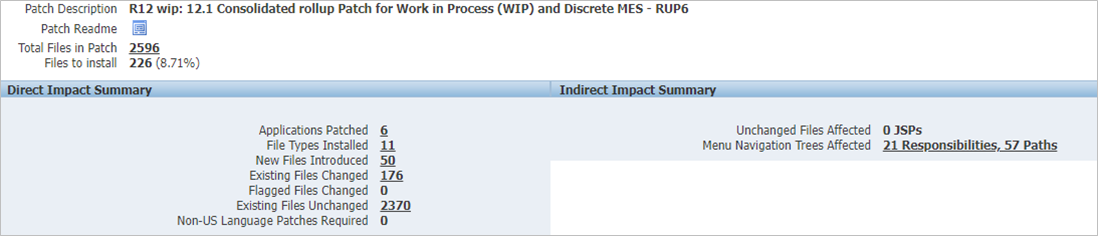
On the next page, click on the icon under the “Impact” column for the patch analyzed. From here, you will be able to see what you came for – an understanding of what this patch will be changing in your environment. Now, you will know how many files will be installed by this patch (note that only files with a higher file version than what we presently have will be deployed to our environment), the number of applications affected, the number of new files, and the number of files being updated (along with loads of other information). Furthermore, any results with a hyperlink will direct you to more details. For example, “Existing Files Changed” will show you precisely which files are being updated, what application they’re for, what directory they will be under, what your current file version is, and what your file version would be if this patch were applied.
With a greater knowledge and deeper understanding of how your environment will be affected by the patches you apply; testers will be able to better target their efforts and scrutinize specific areas of the system that require it. Users can worry less about whether they wasted time testing too much or if there may be issues because they tested too little.