
When creating a new environment in JD Edwards, there are several steps that need to happen in order to get the new environment created with data in the correct places for it to be setup correctly.
These are the overall steps:
- Log into the deployment server, into the JDEPLAN environment
- Copy an existing environment
- Create the Business Data and Control Tables Data Sources (DS’s) (if you’re only creating a new environment and not a new pathcode with it)
NOTE: This requires a new DB to be created to hold the tables for these DS’s as well as copying over those tables into the new DS’s. - Update OCMs – change original Business Data and Control Tables mappings to the new Data Sources that were created for this environment
- Log into a fat client and repeat steps 2 – 4
- Create new Business Data and Control Tables Data Sources in Server Map
- Copy OCMs from System to Server Map using R98611A, which calls R986121
- Create a new JAS instance for the new environment
Below are the details for each of those steps.
1) Log into the deployment server, into the JDEPLAN environment
Logging into the deployment server and copying an environment will create OCMs in Planner, but not in System. Therefore, creating an environment needs to occur in BOTH JDEPLAN (deployment server in the JDEPLAN environment) and SYSTEM (fat client from any environment). So, log into JDEPLAN, first, to create this new environment.
2) Copy an existing environment

Copy environment. Make sure Copy *Public Records Only box is checked:

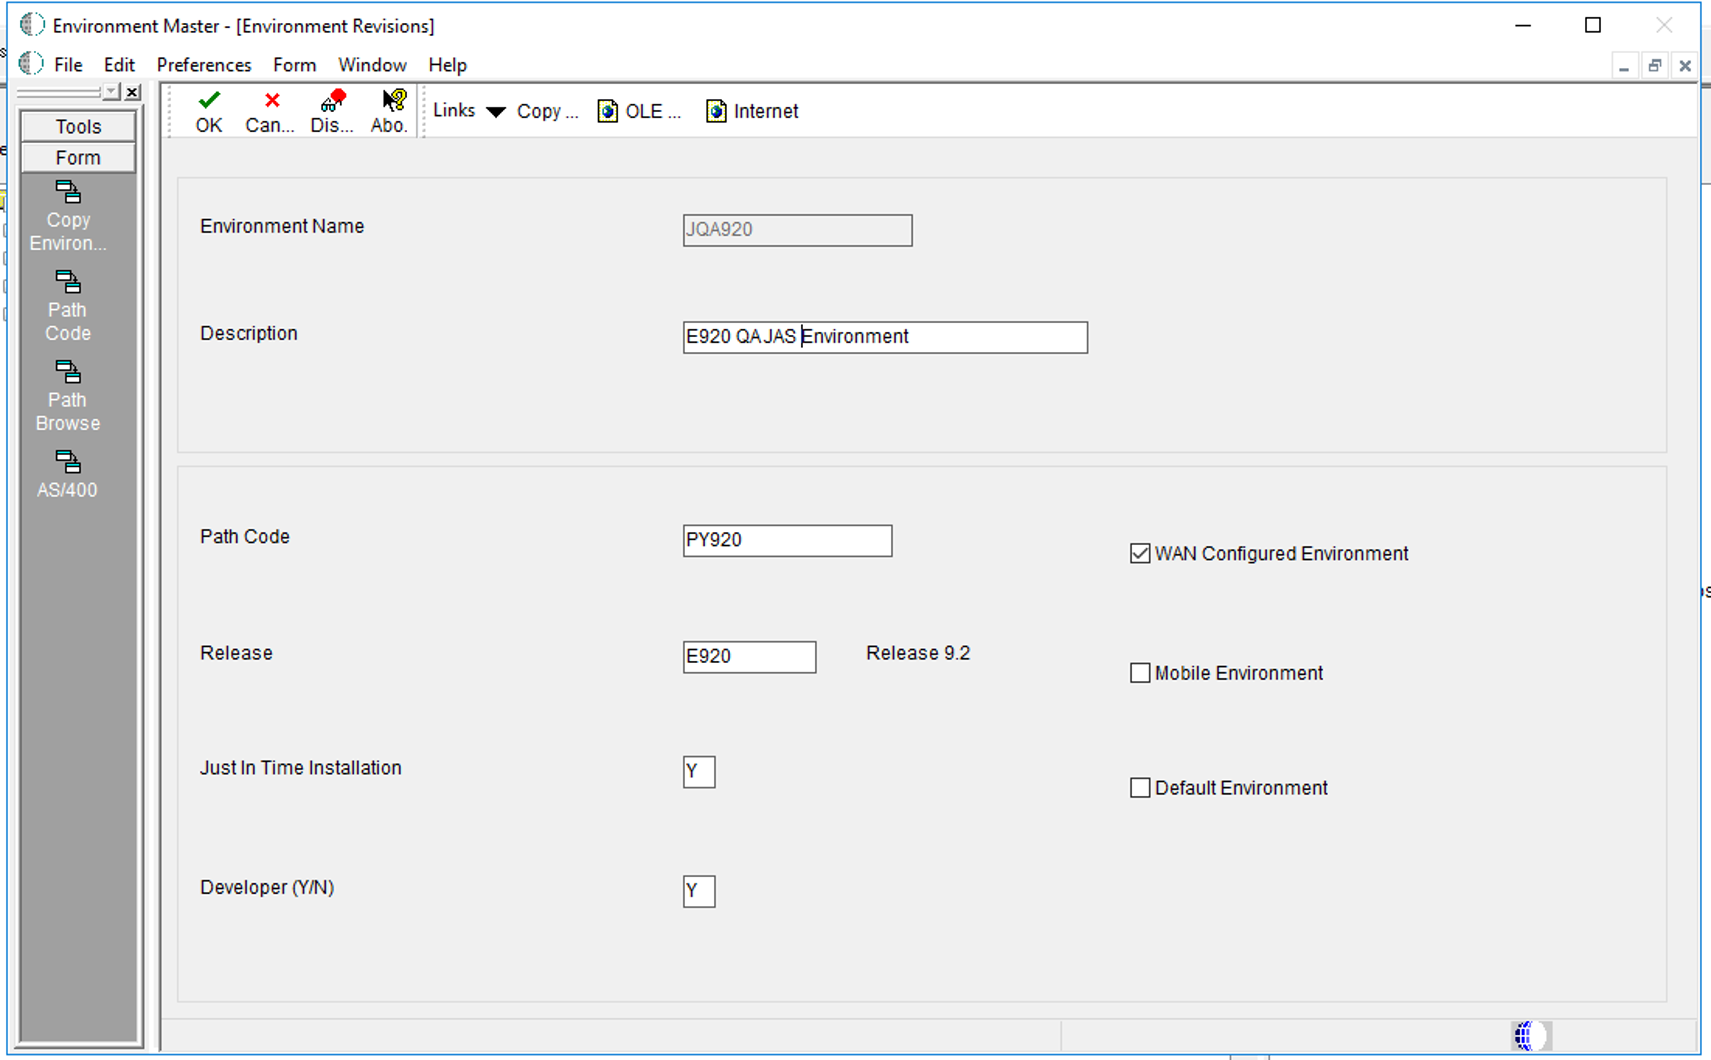
Copy the J environment as well:

Change the name of the environment:
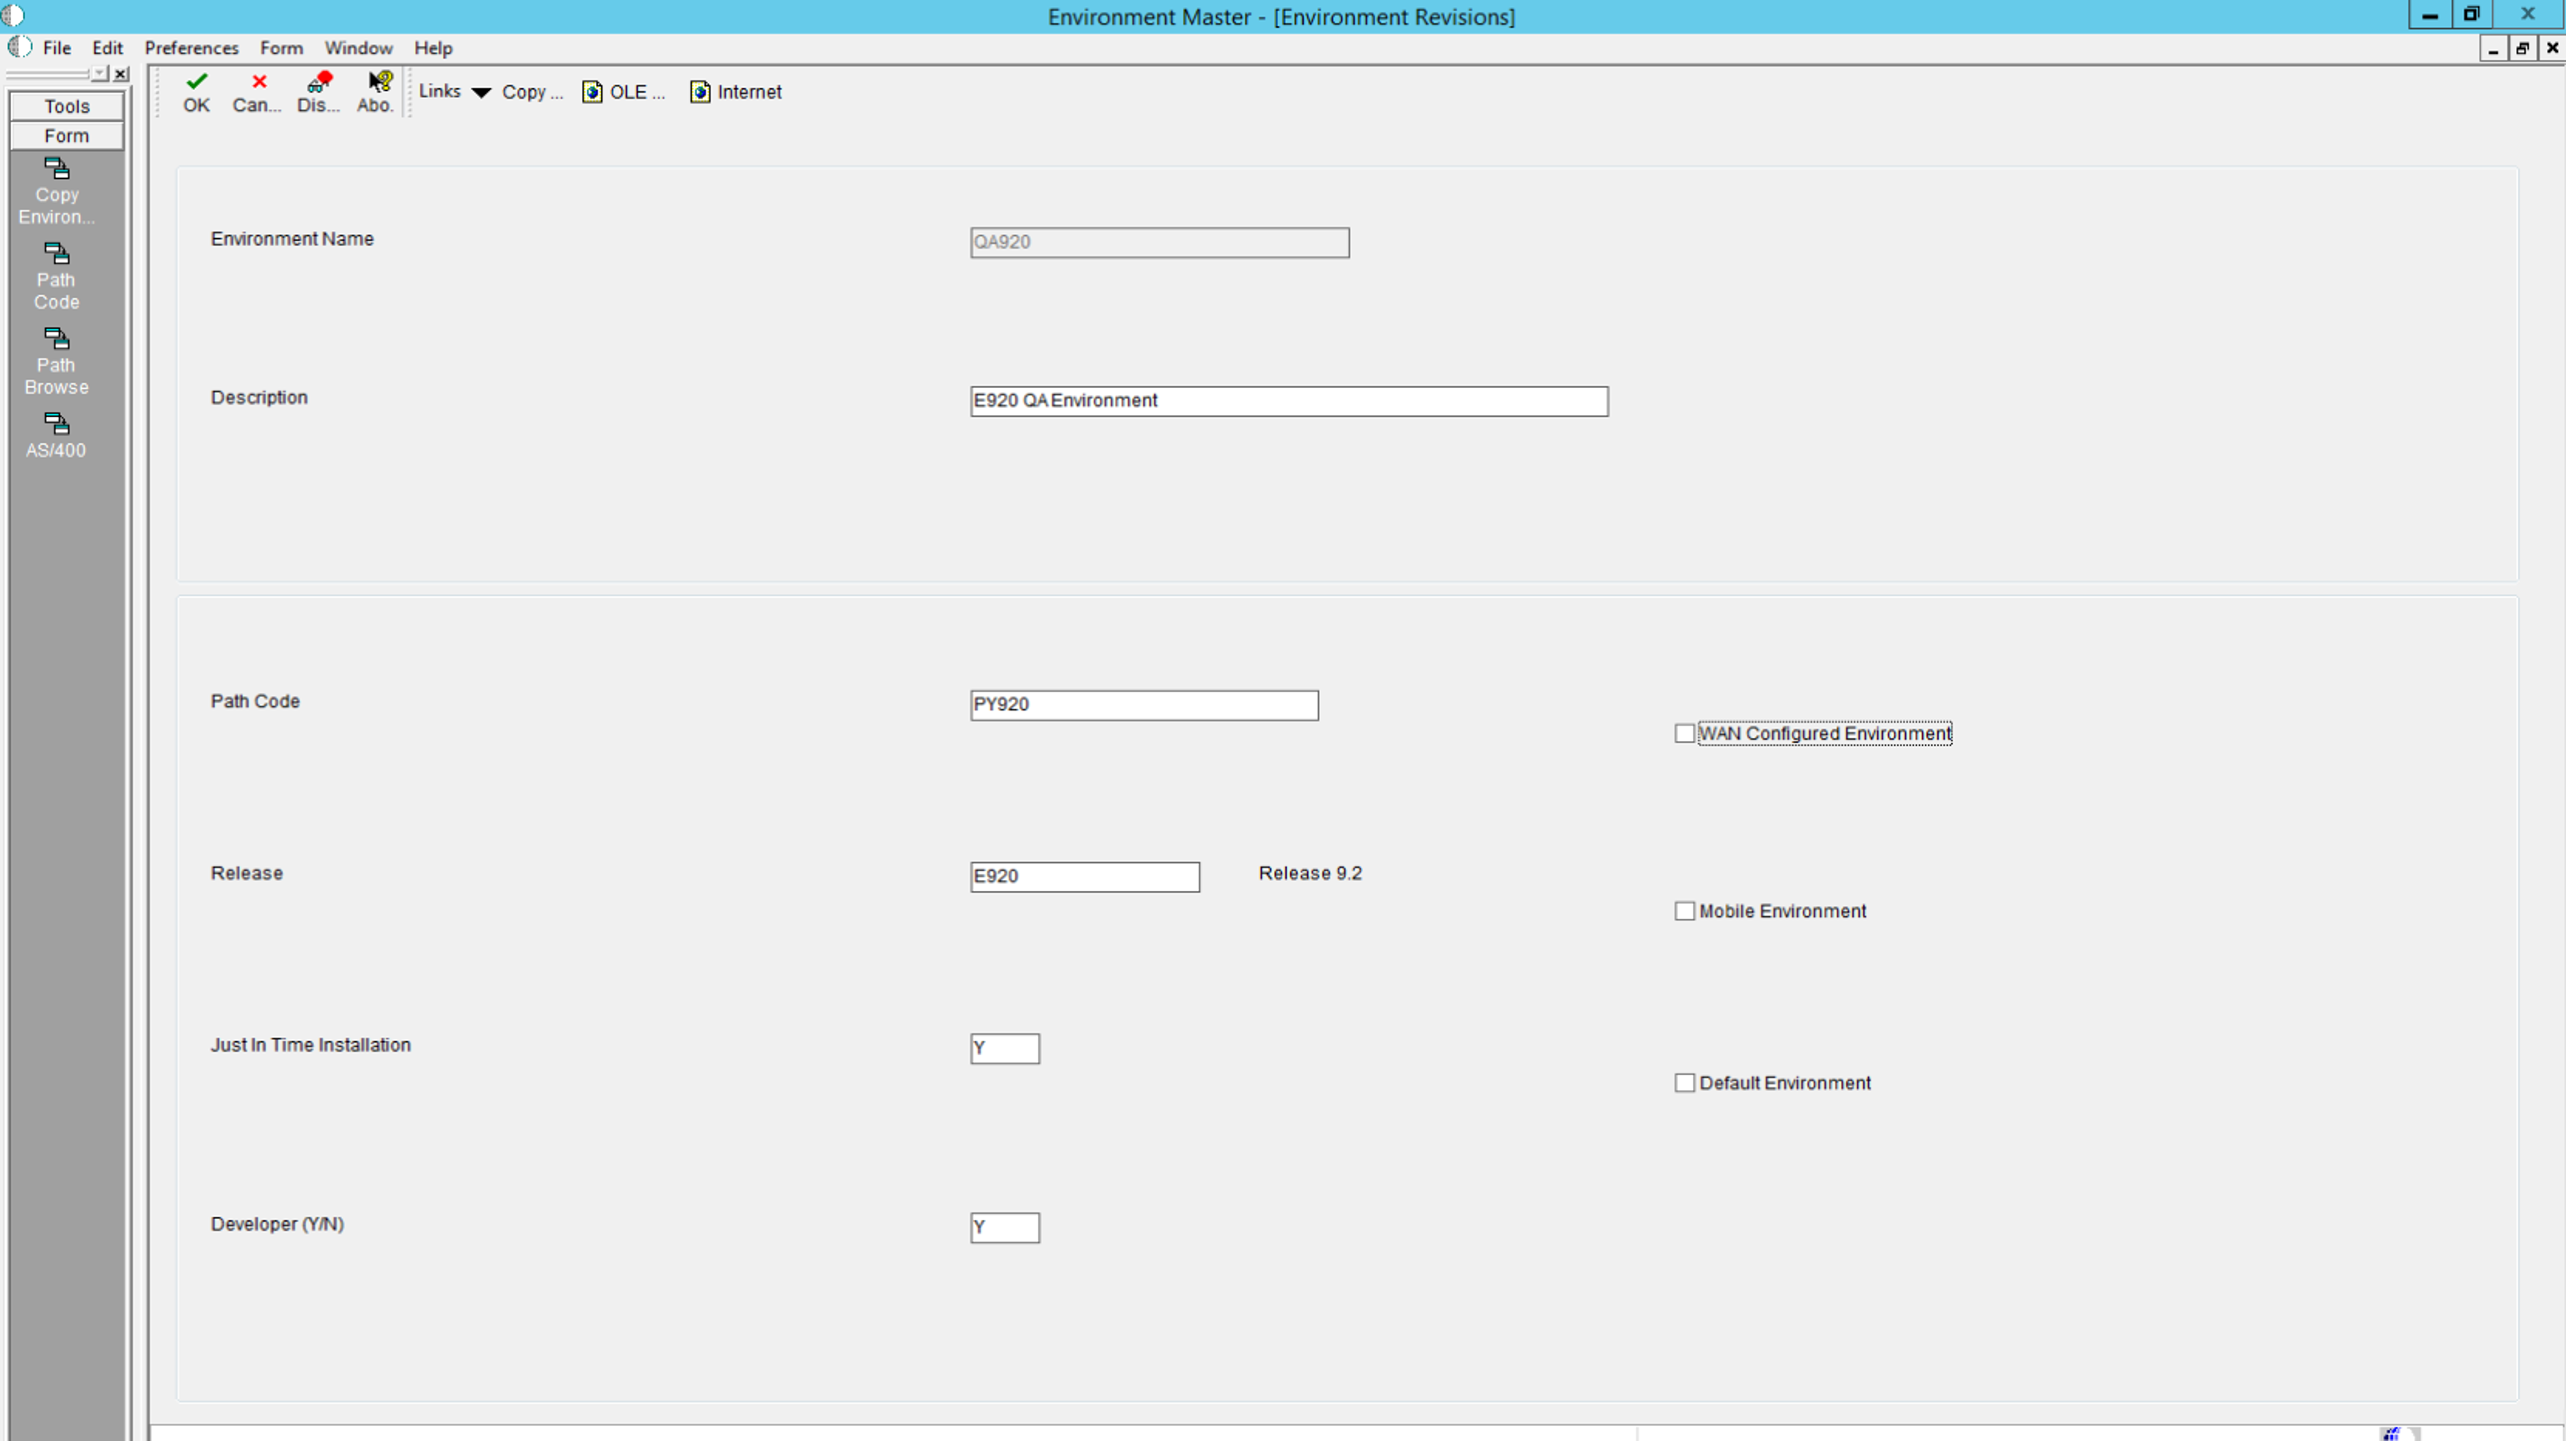
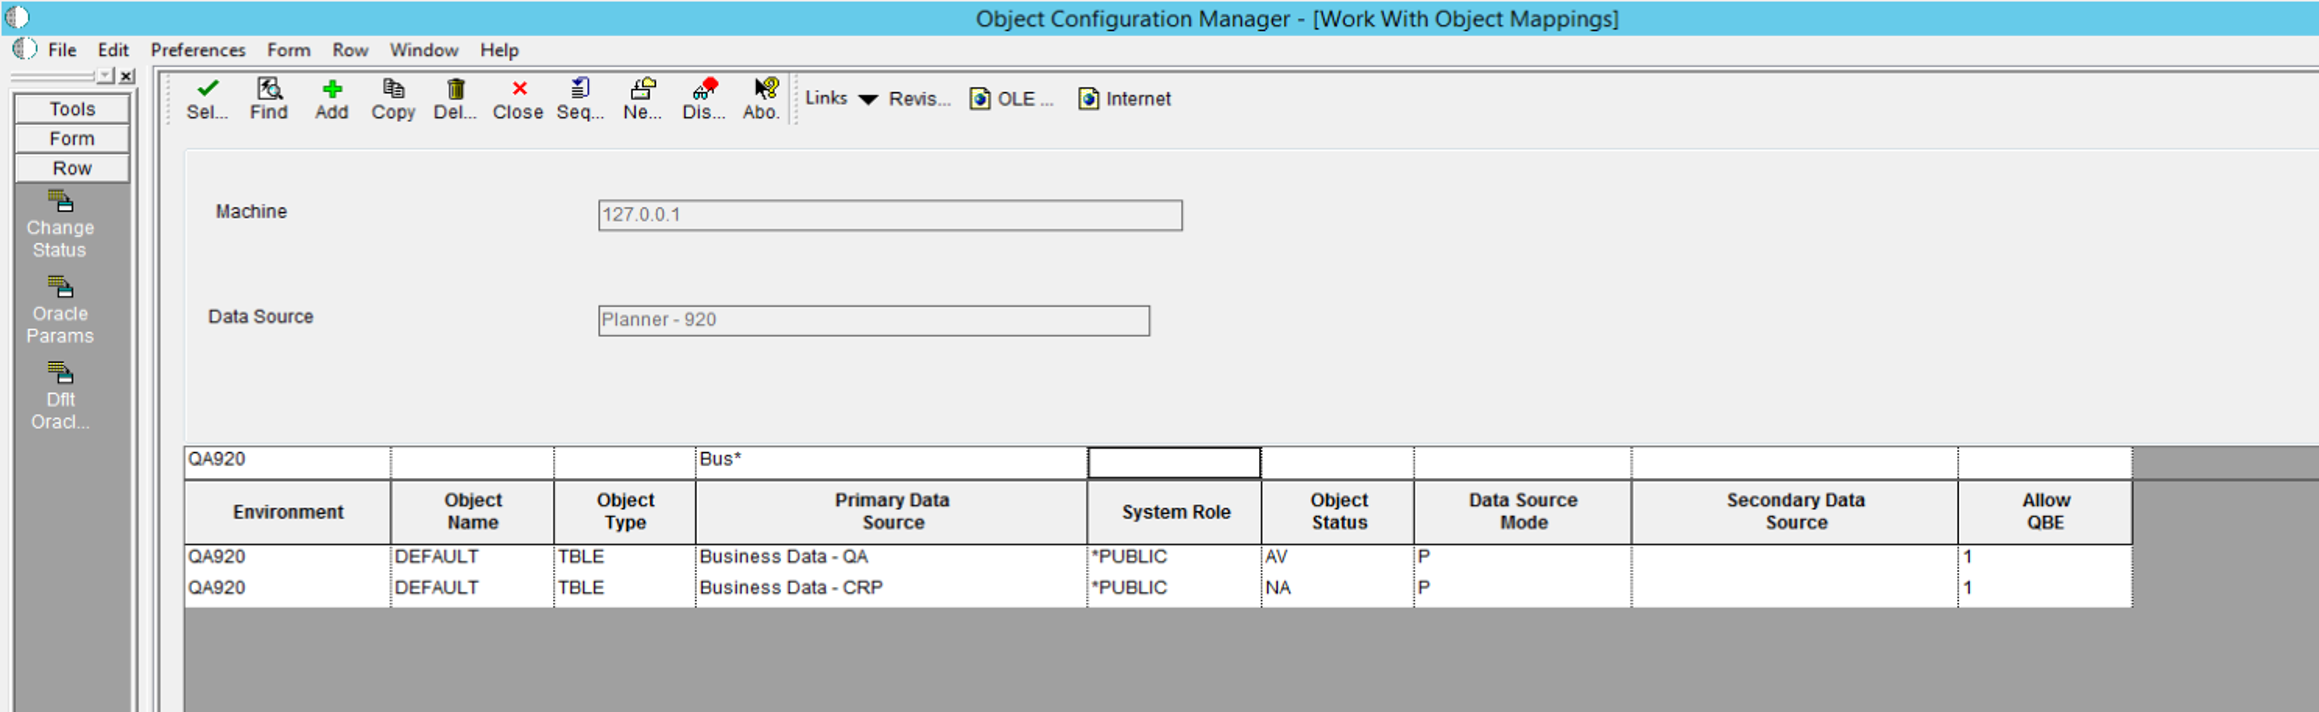
Planner shows QA920 environment mappings:
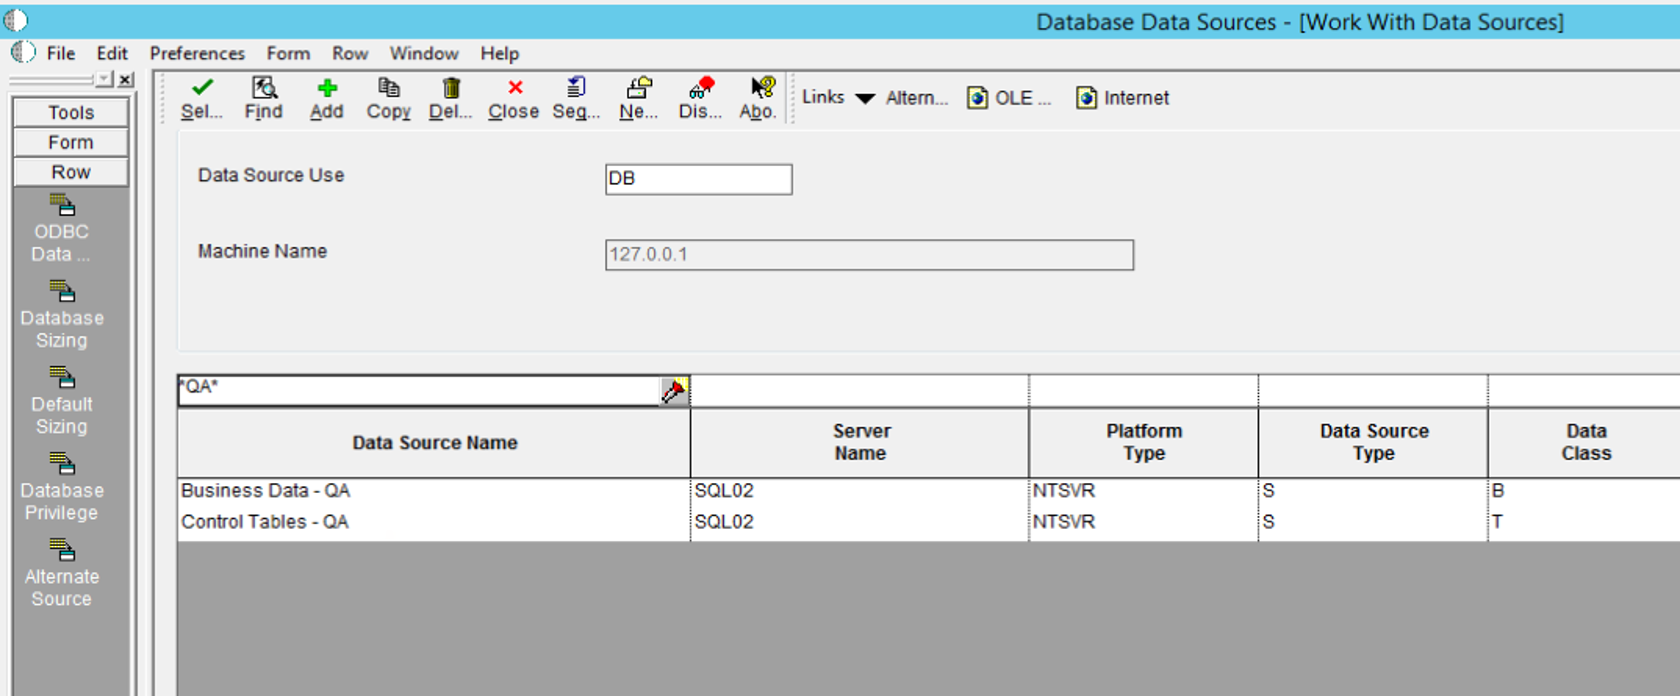
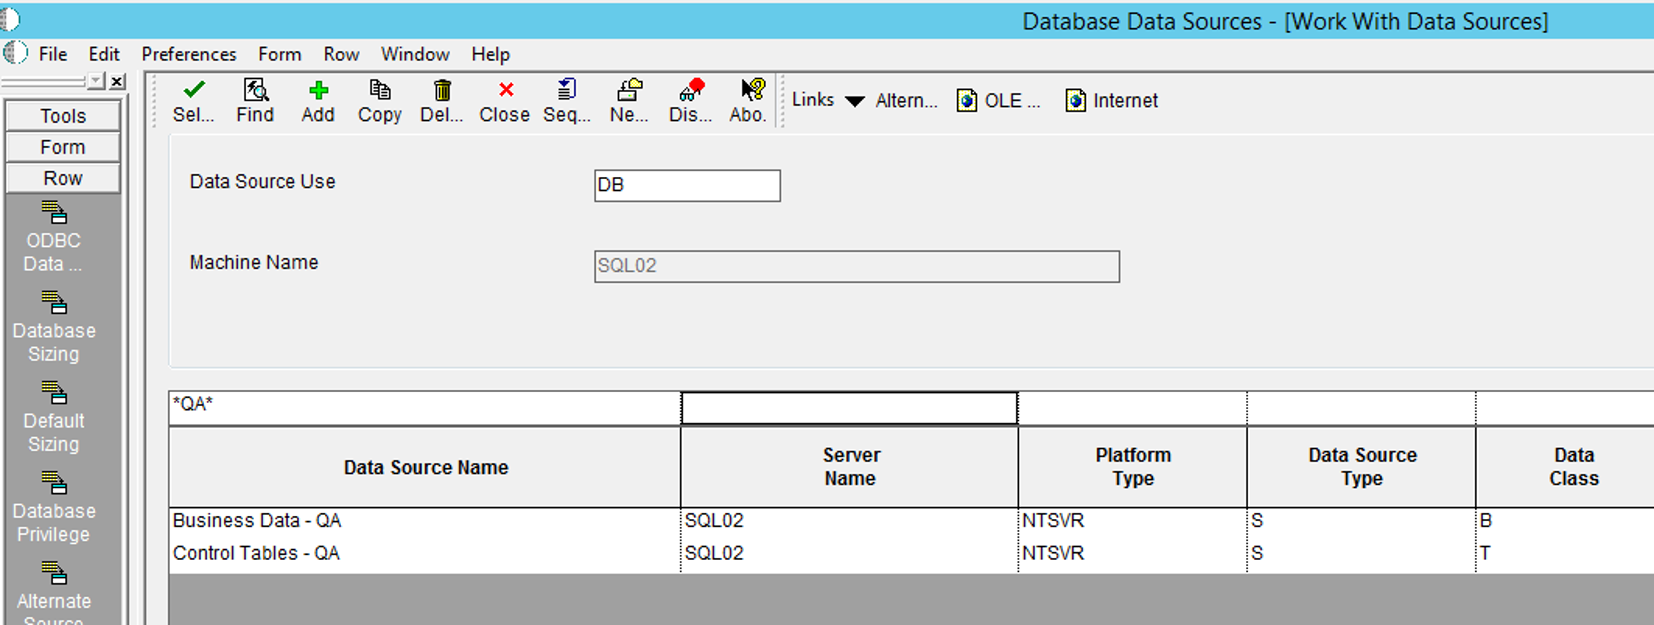
3) Create the Business Data and Control Tables Data Sources (DS’s)
(If you’re only creating a new environment and not a new pathcode with it)
NOTE: This requires a new DB to be created to hold the tables for these DS’s as well as copying over those tables into the new DS’s.
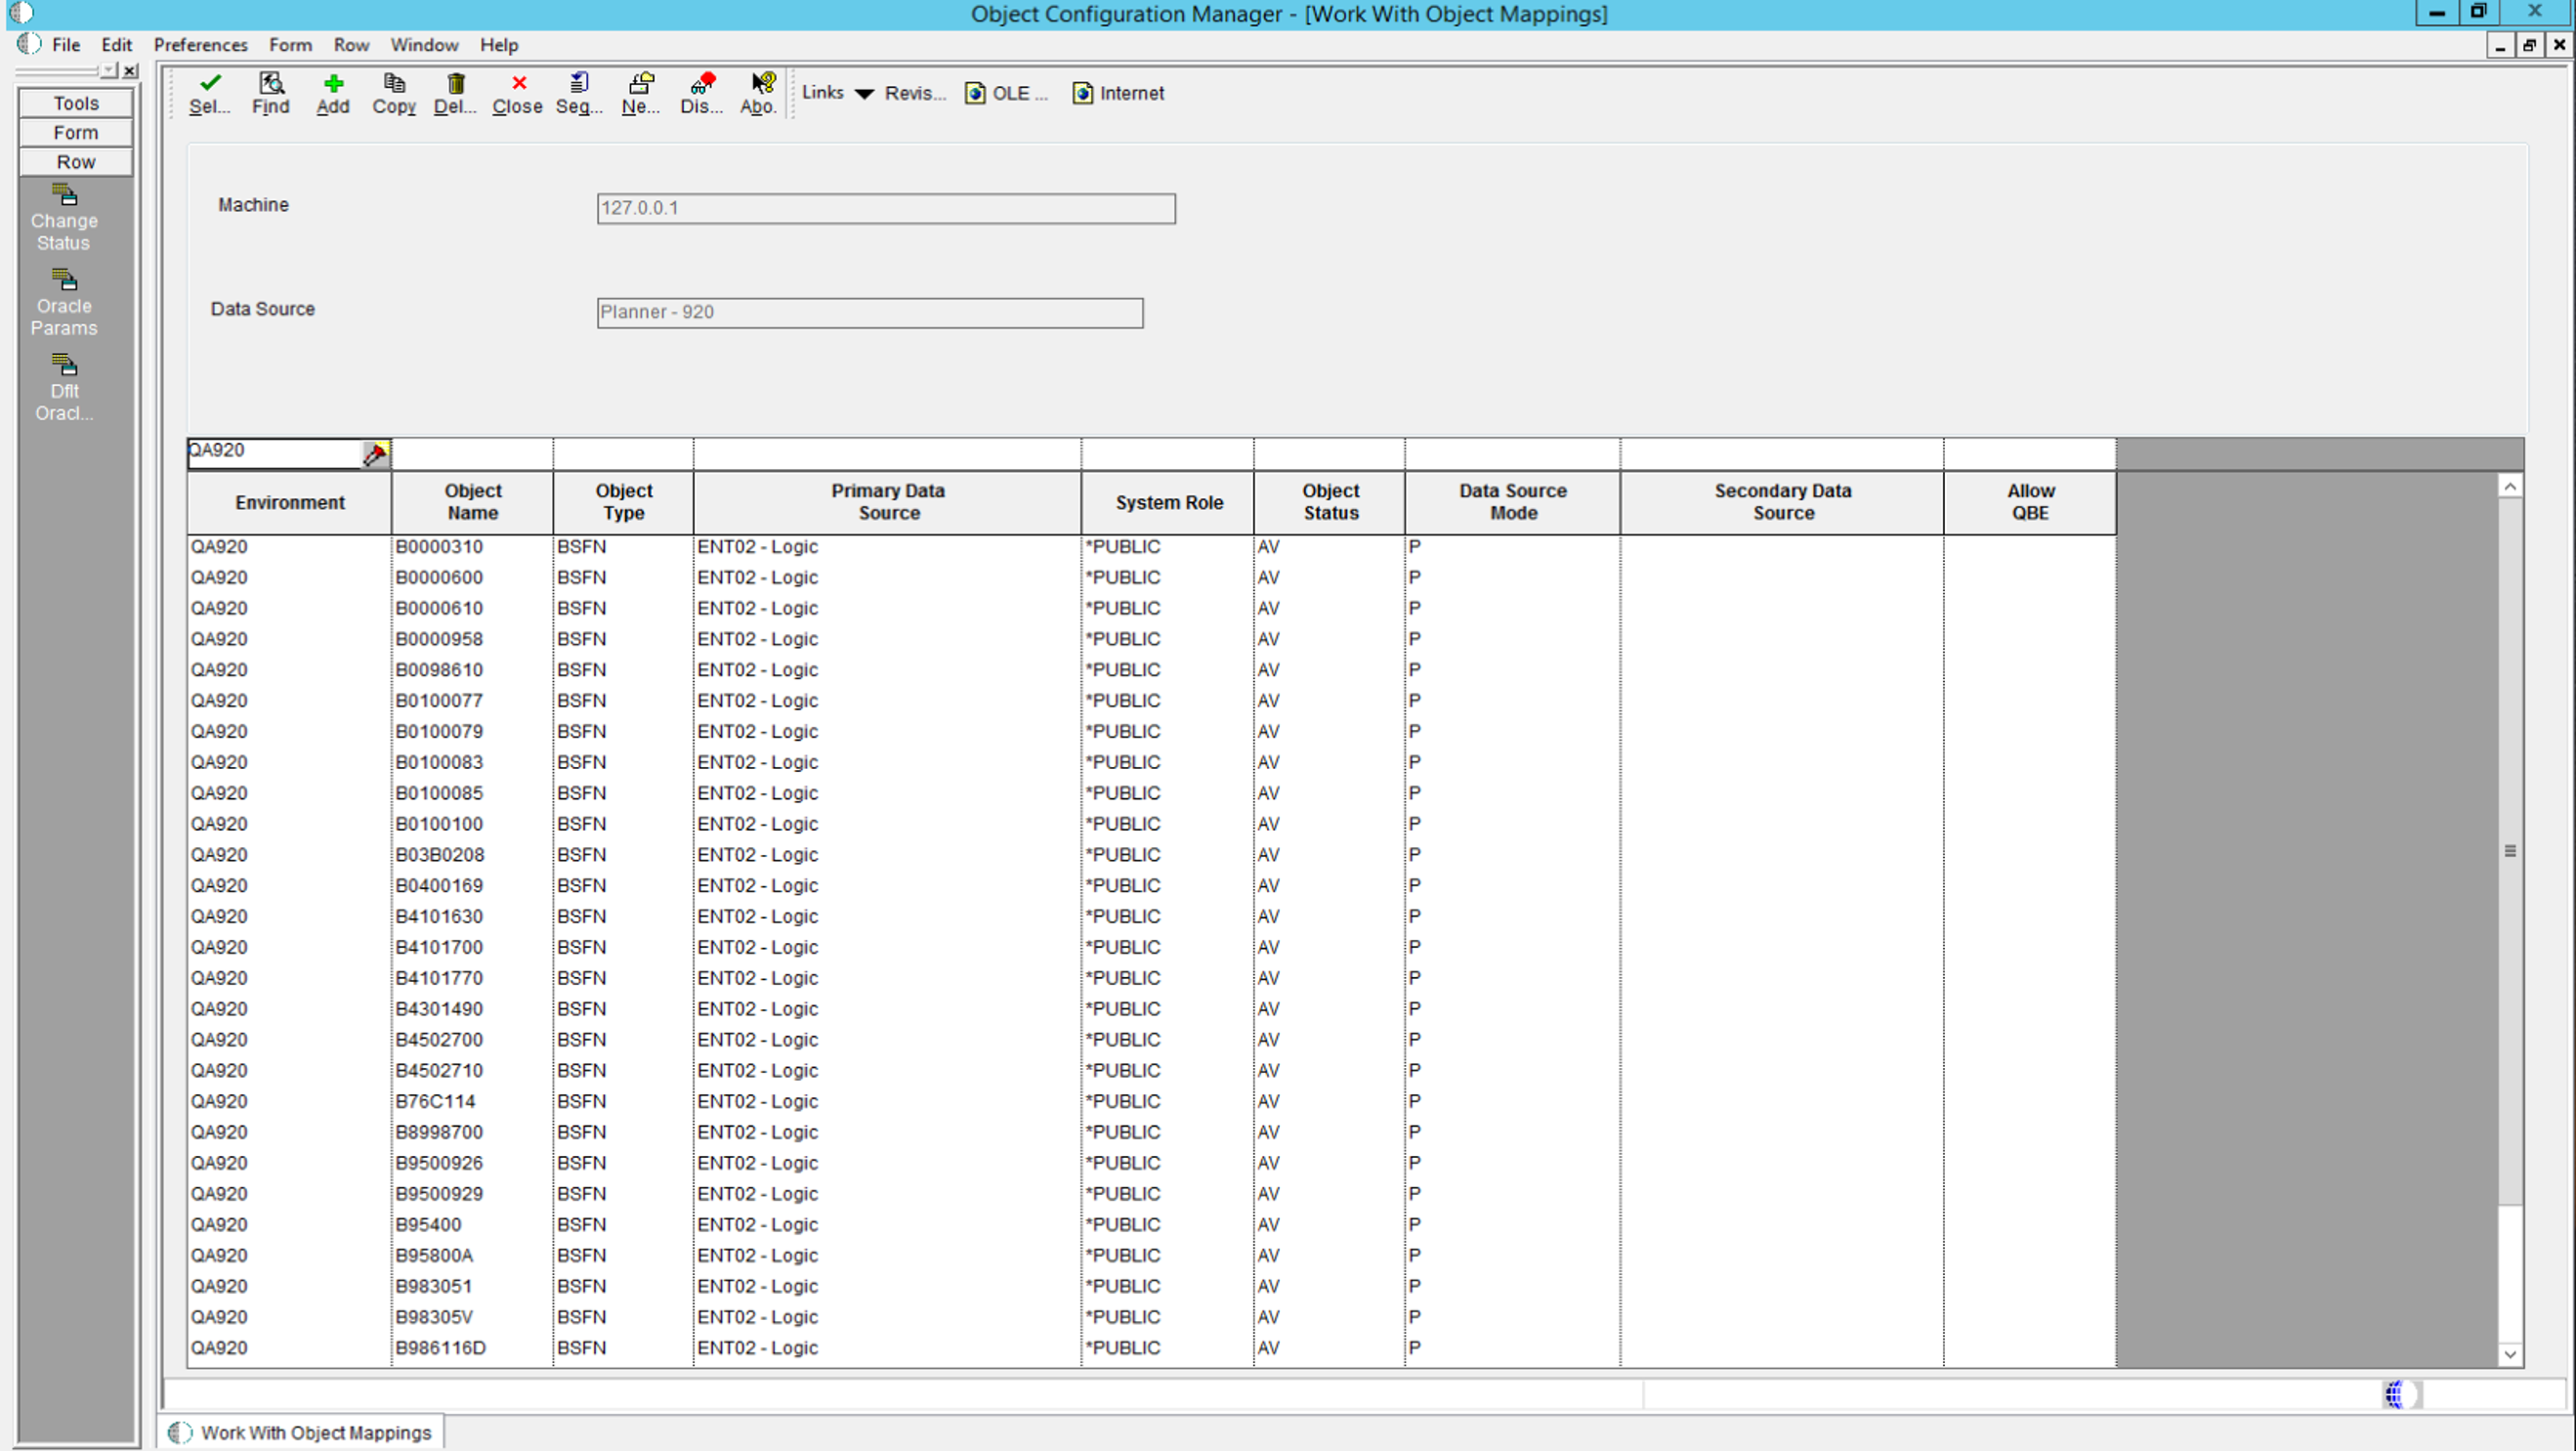
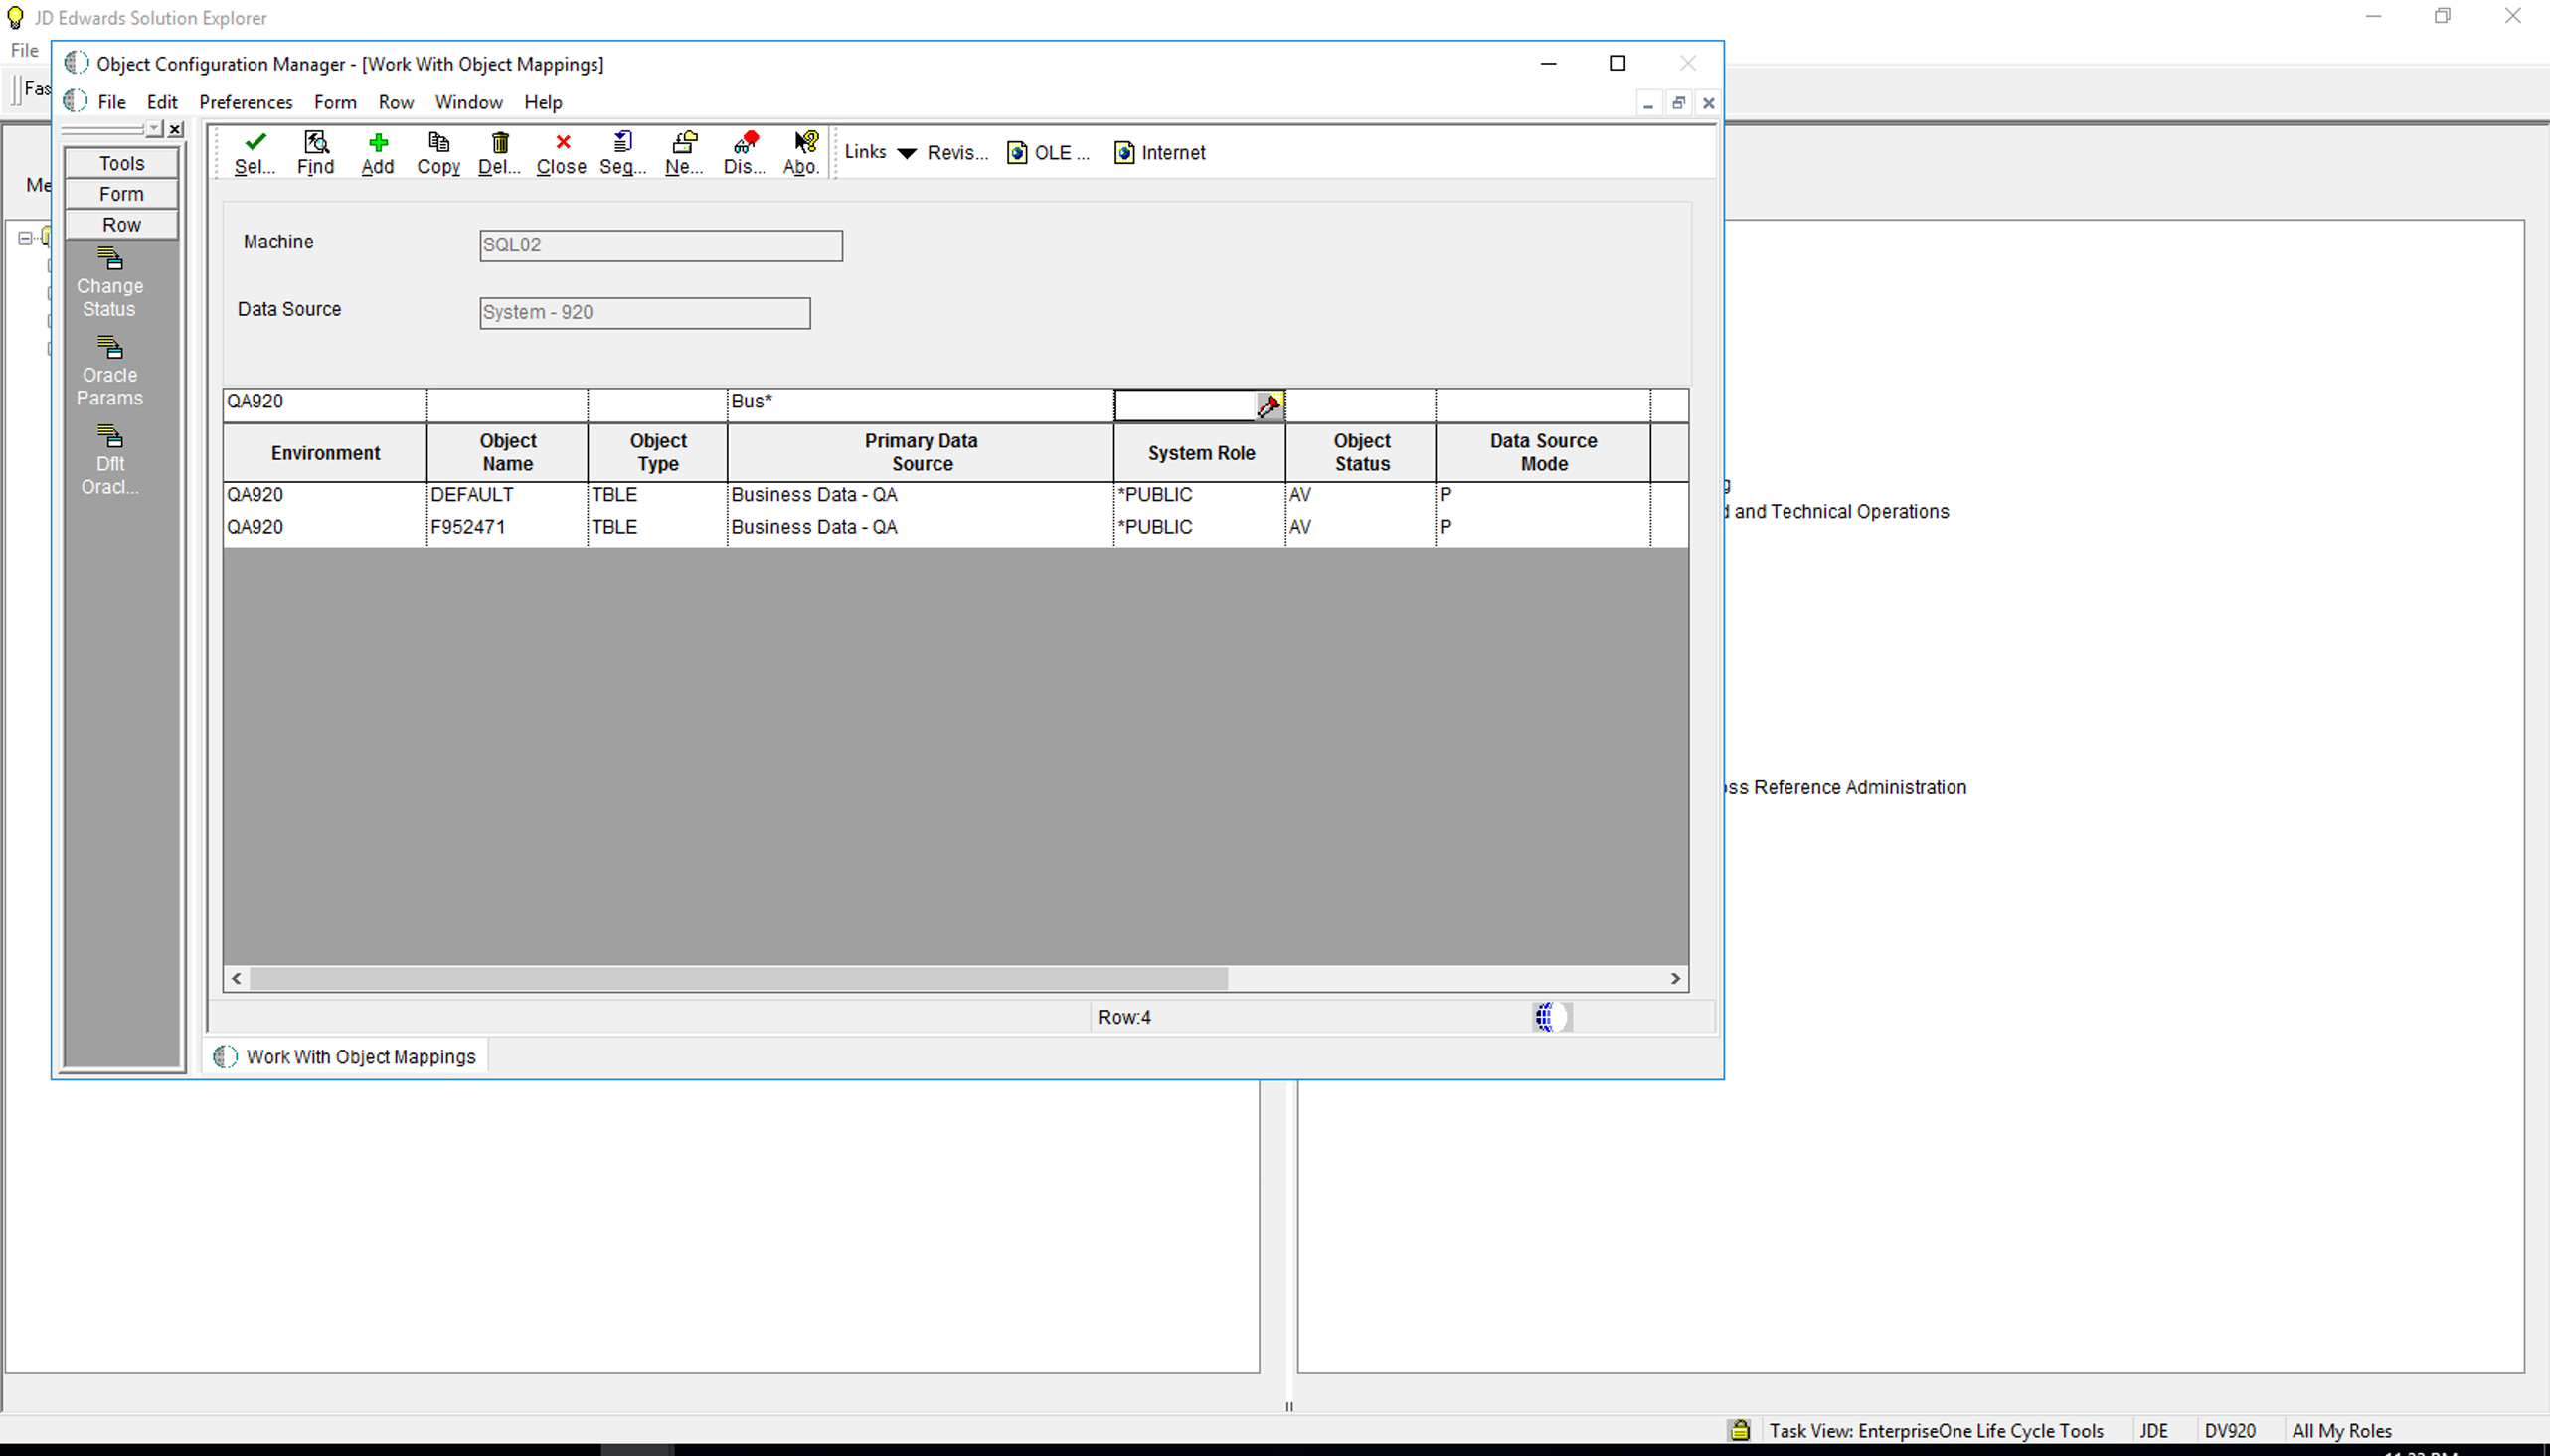
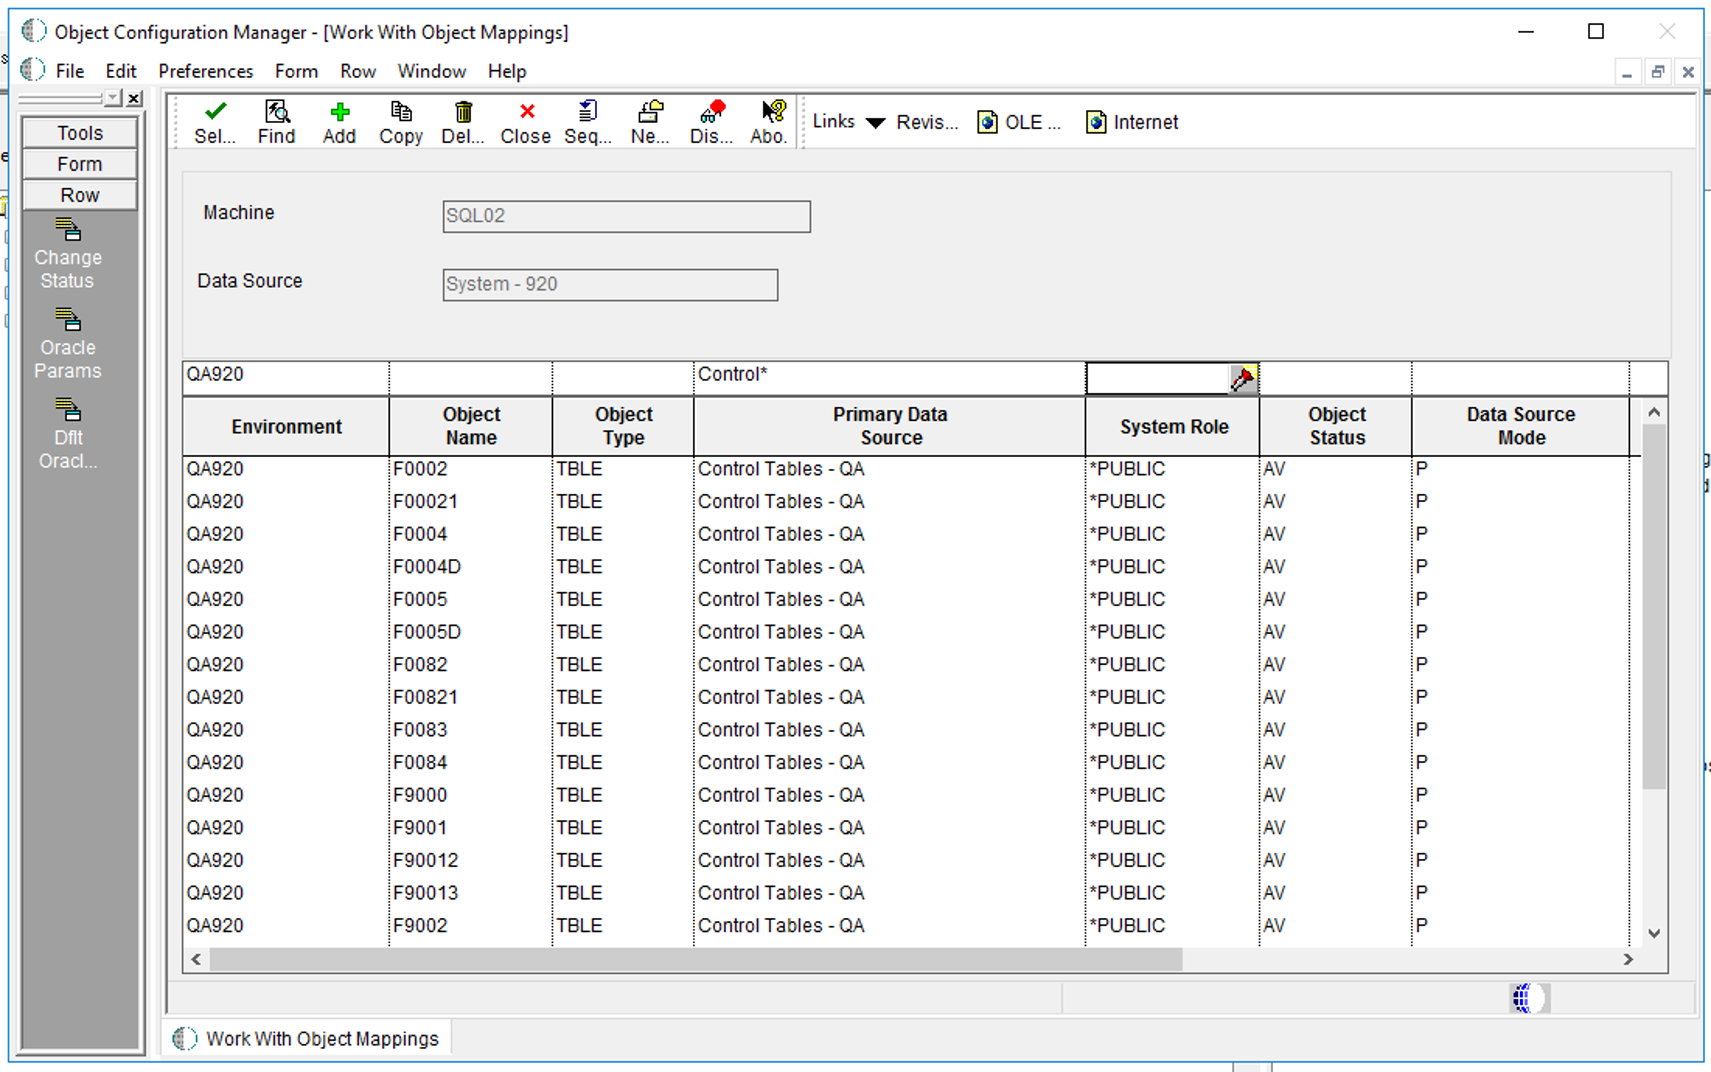
4) Update OCMs
Change original Business Data and Control Tables mappings to the new Data Sources that were created for this environment.
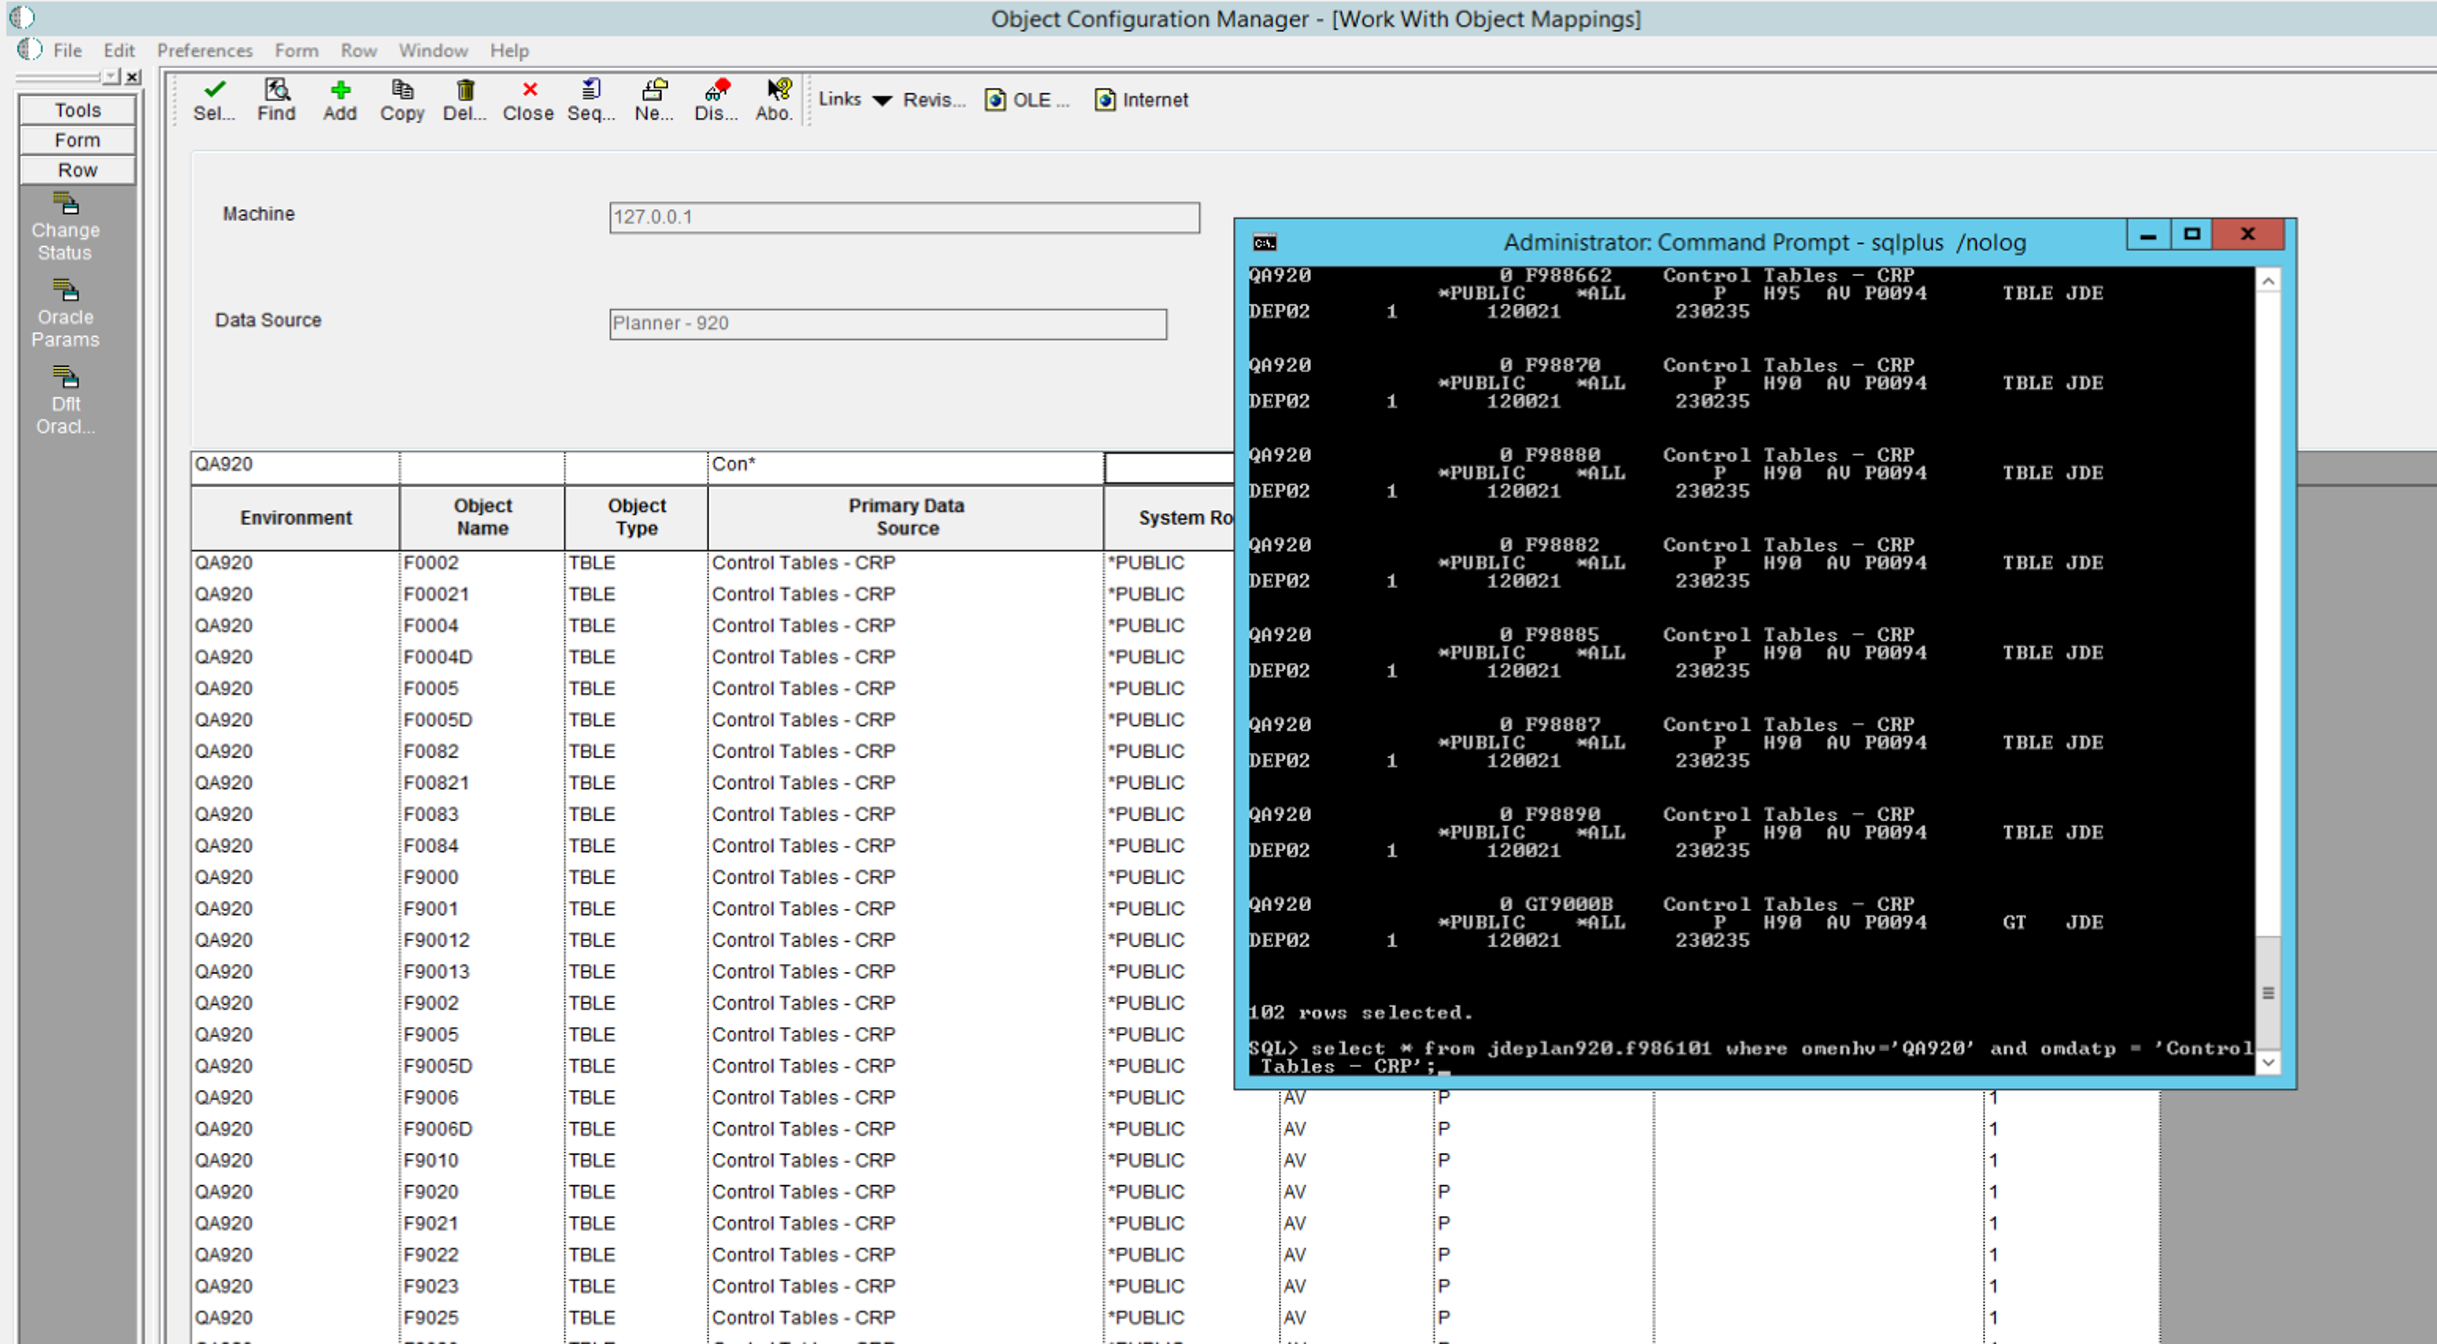
Update DEFAULT TBLE from Business Data – CRP to Business Data – QA. Of course, you’ll need to have created the DB and the Data Source prior to this step.
Do the same with Control Tables – CRP to Control Tables – QA.
Update Control Tables as well but it’s easier to update the JDEPLAN environment through sqlplus than it is to copy each mapping through P986110. Since JDEPLAN DB is an Oracle DB, use sqlplus from cmd line to update the table.

D:\Oracle\E1Local\BIN>sqlplus /nolog
SQL*Plus: Release 12.1.0.2.0 Production on Wed Jan 22 00:29:14 2020
Copyright (c) 1982, 2014, Oracle. All rights reserved.
SQL> connect JDE/JDE@E1LOCAL
Connected.
SQL> select * from jdeplan920.f986101 where omenhv = ‘QA920’ and omdatp = ‘Control Tables – CRP’;
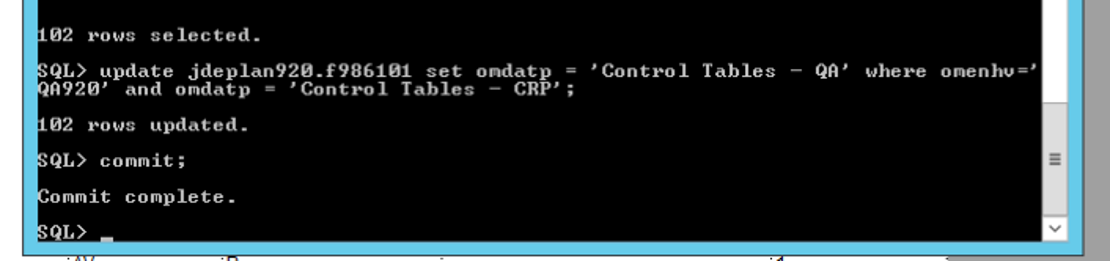
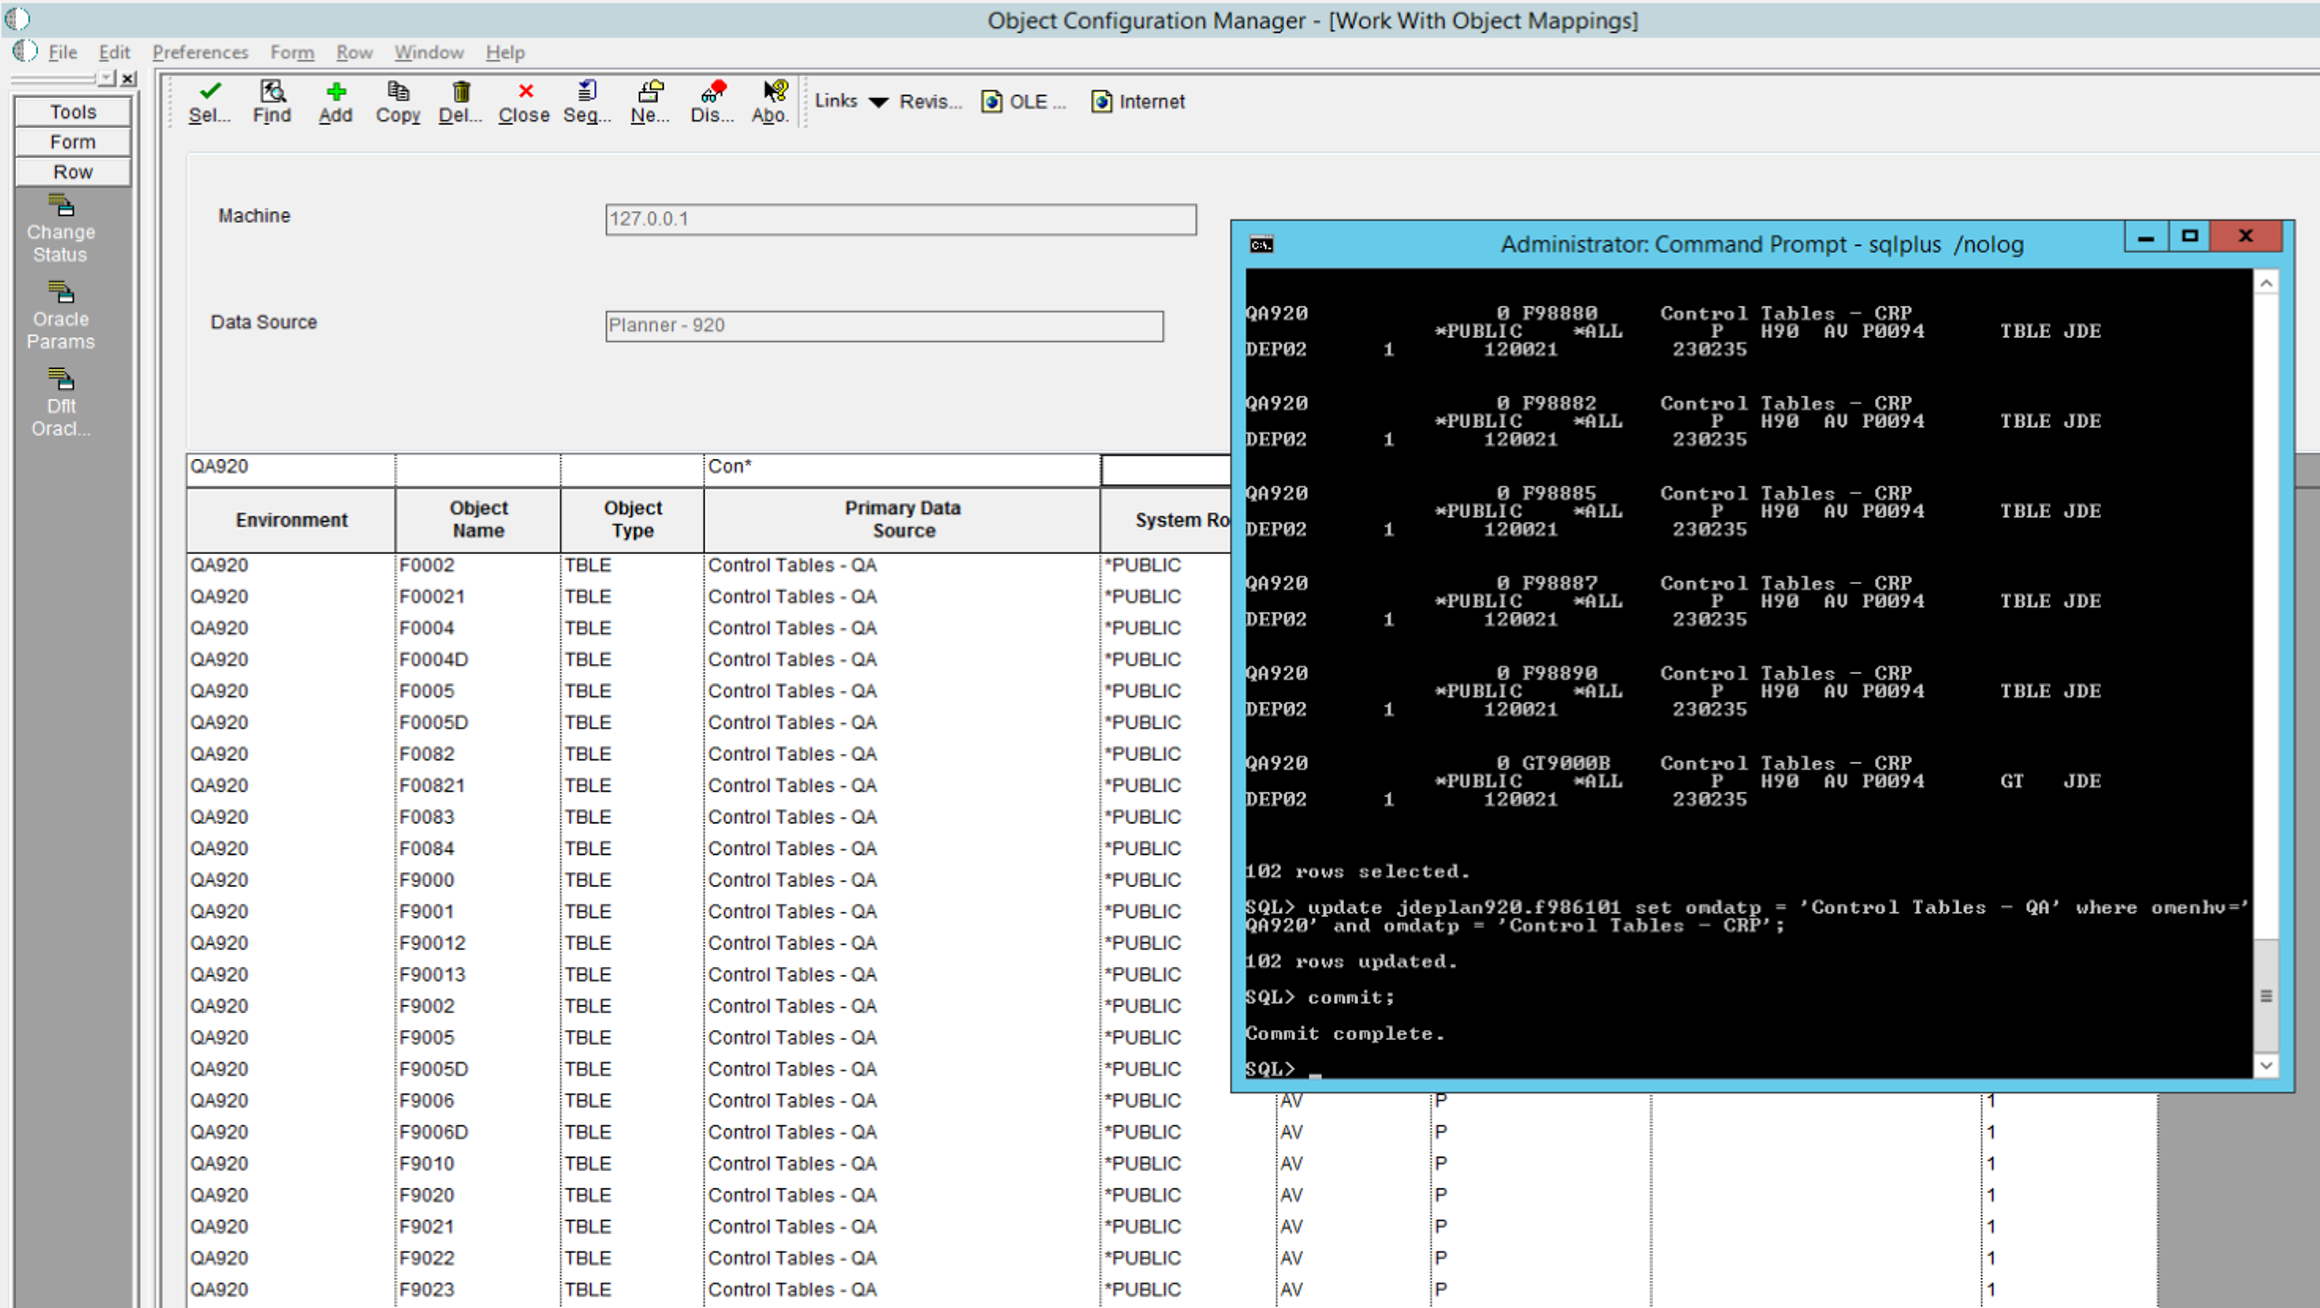
SQL> update jdeplan920.f986101 set omdatp = ‘Control Tables – QA’ where omenhv=’QA920′ and omdatp = ‘Control Tables – CRP’;
102 rows updated.
SQL> commit;
Commit complete.
NOTE: You must add the commit at the end, otherwise the table really hasn’t been changed.
5) Log into a fat client and repeat steps 2 – 4
Do the same steps from a fat client to create the new environment in System as well.
Update OCMs – change original Business Data and Control Tables mappings to the new Data Sources that were created for this environment. (Same as #4 but this time in the System Data Source OCM table, which in this case exists in a SQL Server Database.)
update sy920.f986101 set omdatp = 'Control Tables - QA' where omenhv = 'QA920' and omdatp = 'Control Tables - CRP';
select * from sy920.f986101 where omenhv = 'QA920' and omdatp like 'Control Tables -%';

6) Create new Business Data and Control Tables Data Sources in Server Map
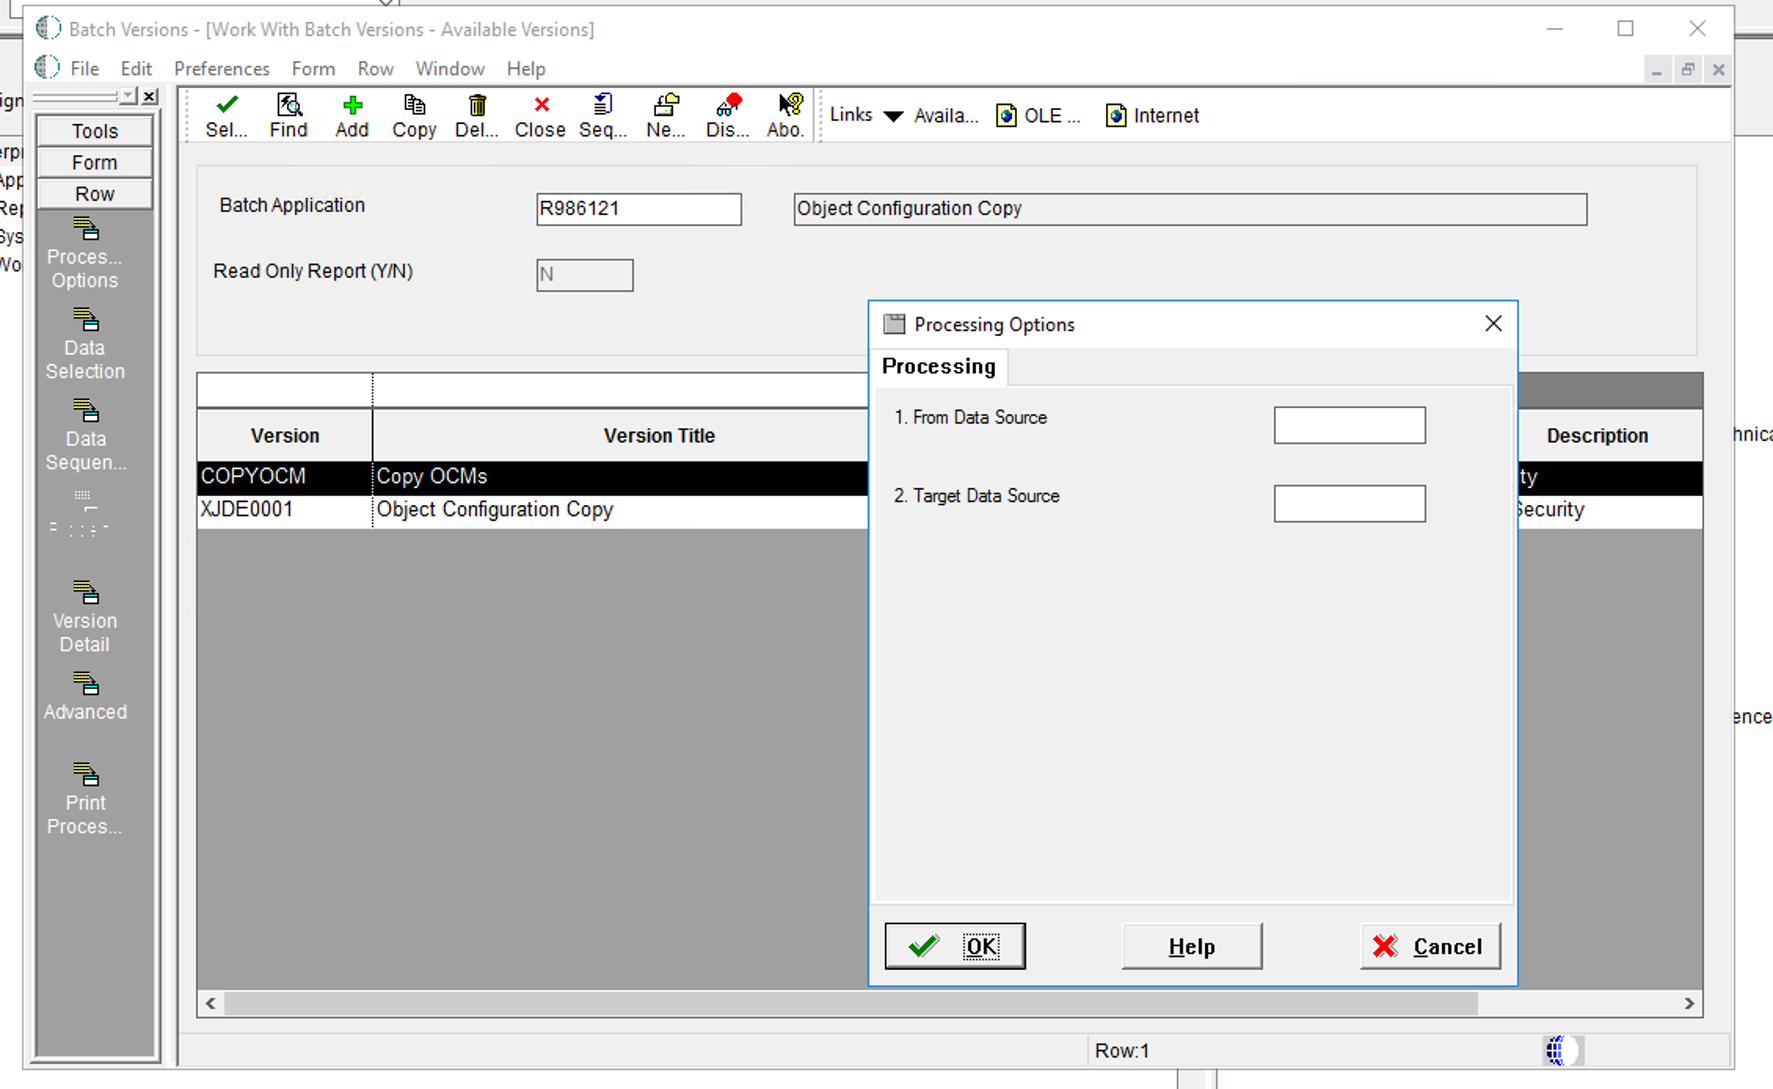
7) Copy OCMs from System to Server Map using R98611A, which calls R986121
From a fat client, open BV and find R986121. Create a new version.
Processing options should be blank:
Add Data Selection:
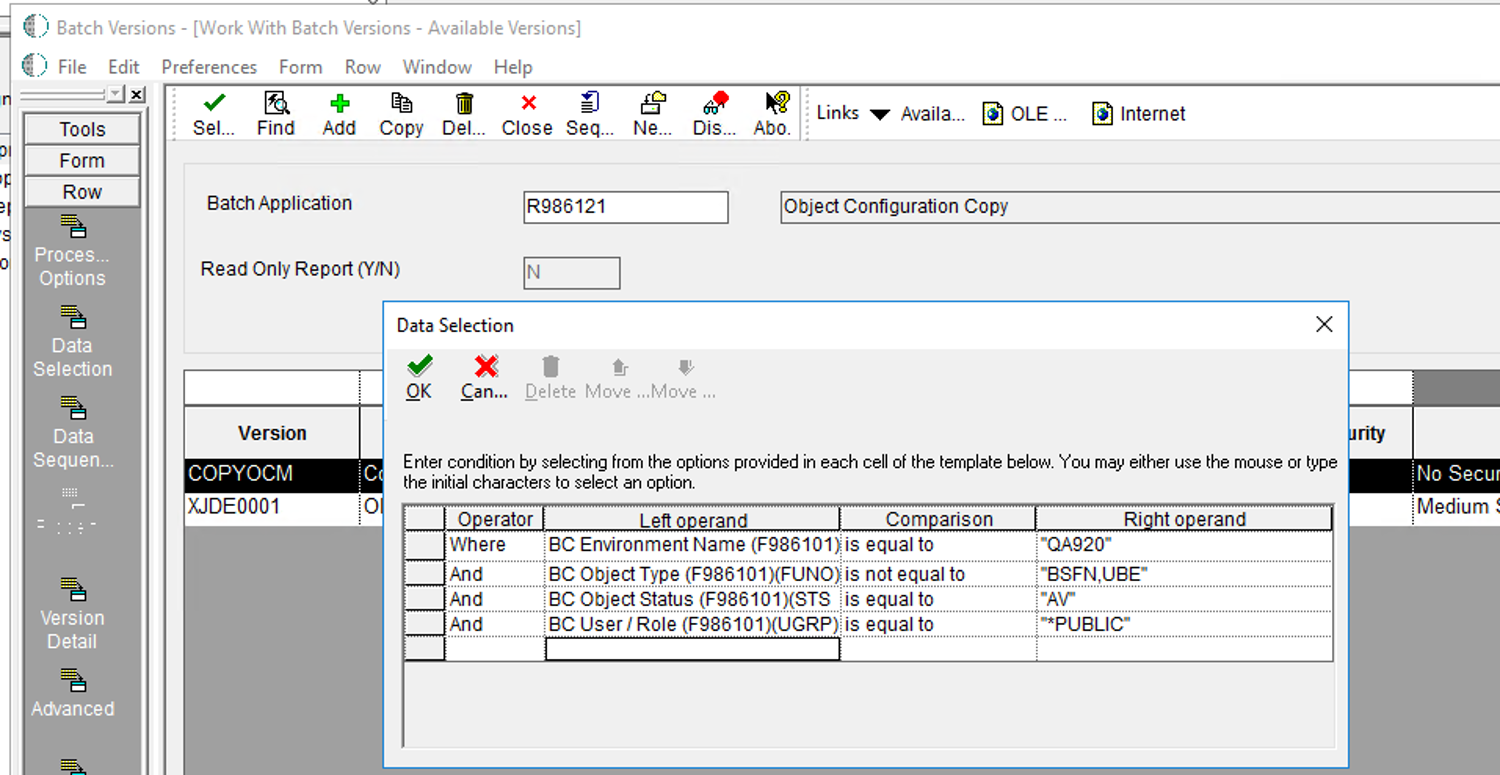
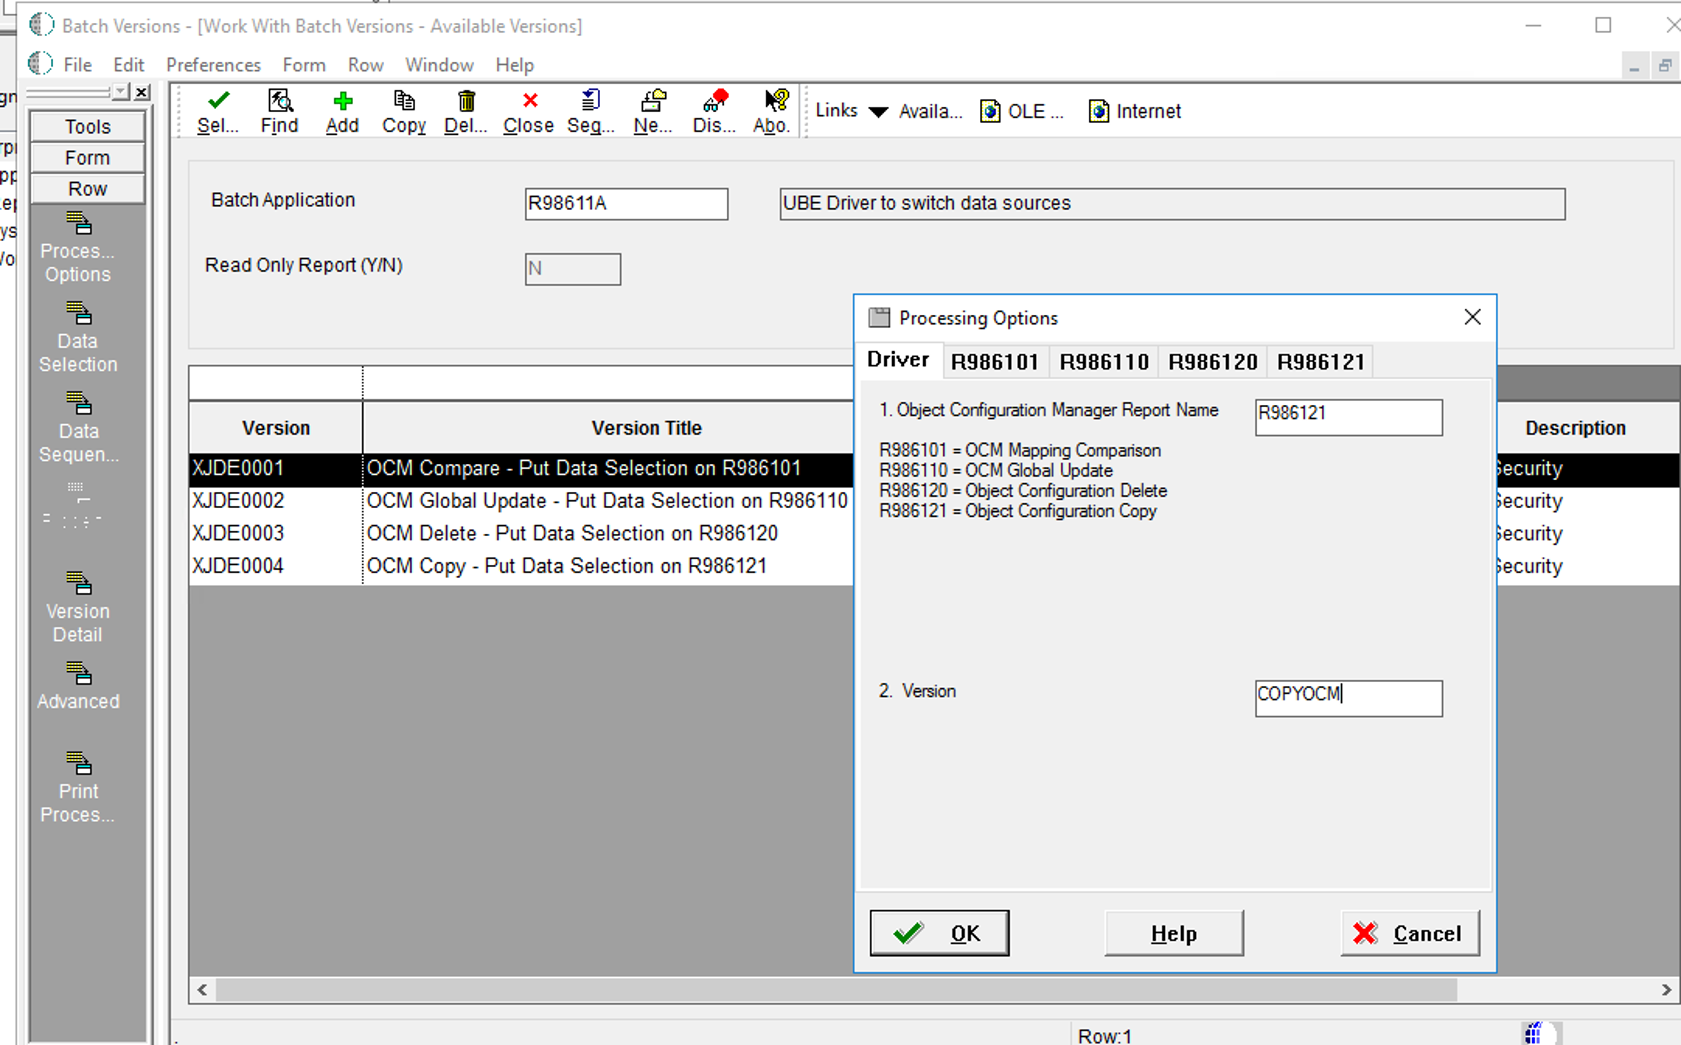
Find R98611A, select the XJDE0001, update Processing Options:
Driver
2. Version: COPYOCM
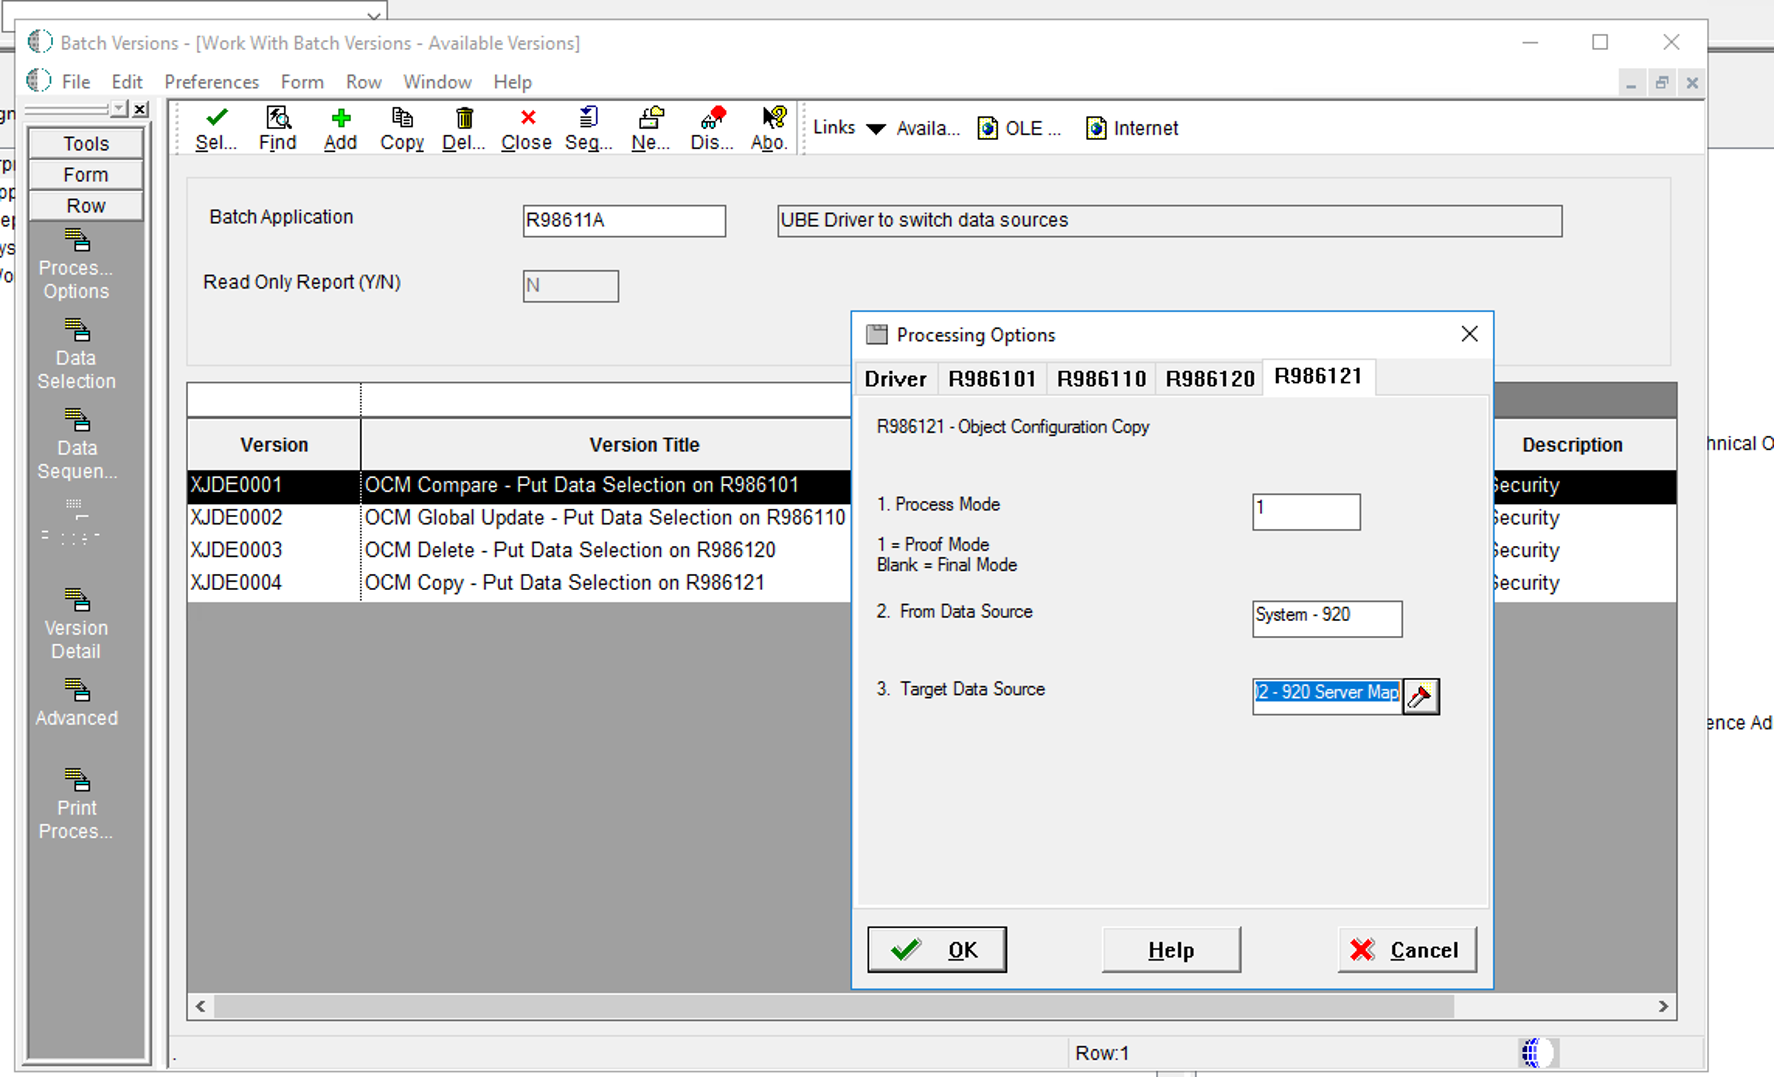
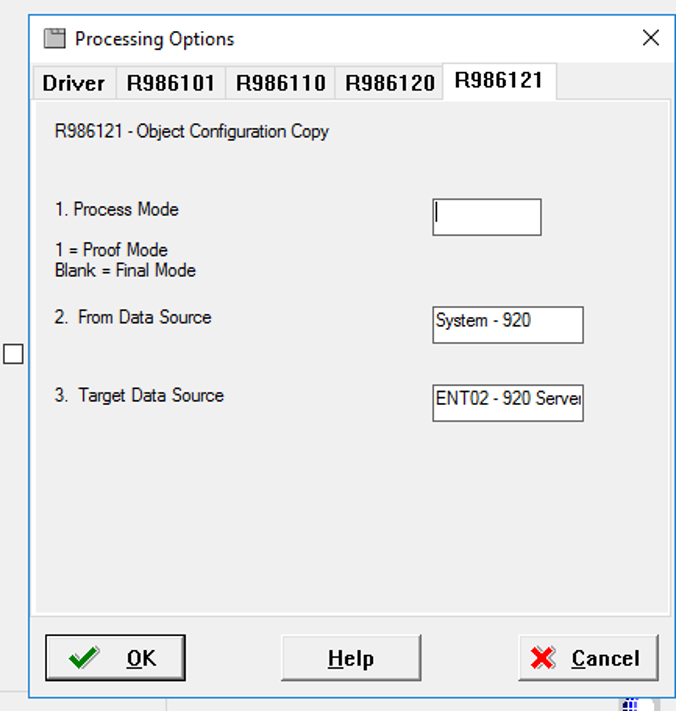
Change Processing Options R986121 tab:
2. From Data Source: System – 920
3. Target Data Source: ENT02 – 920 Server Map
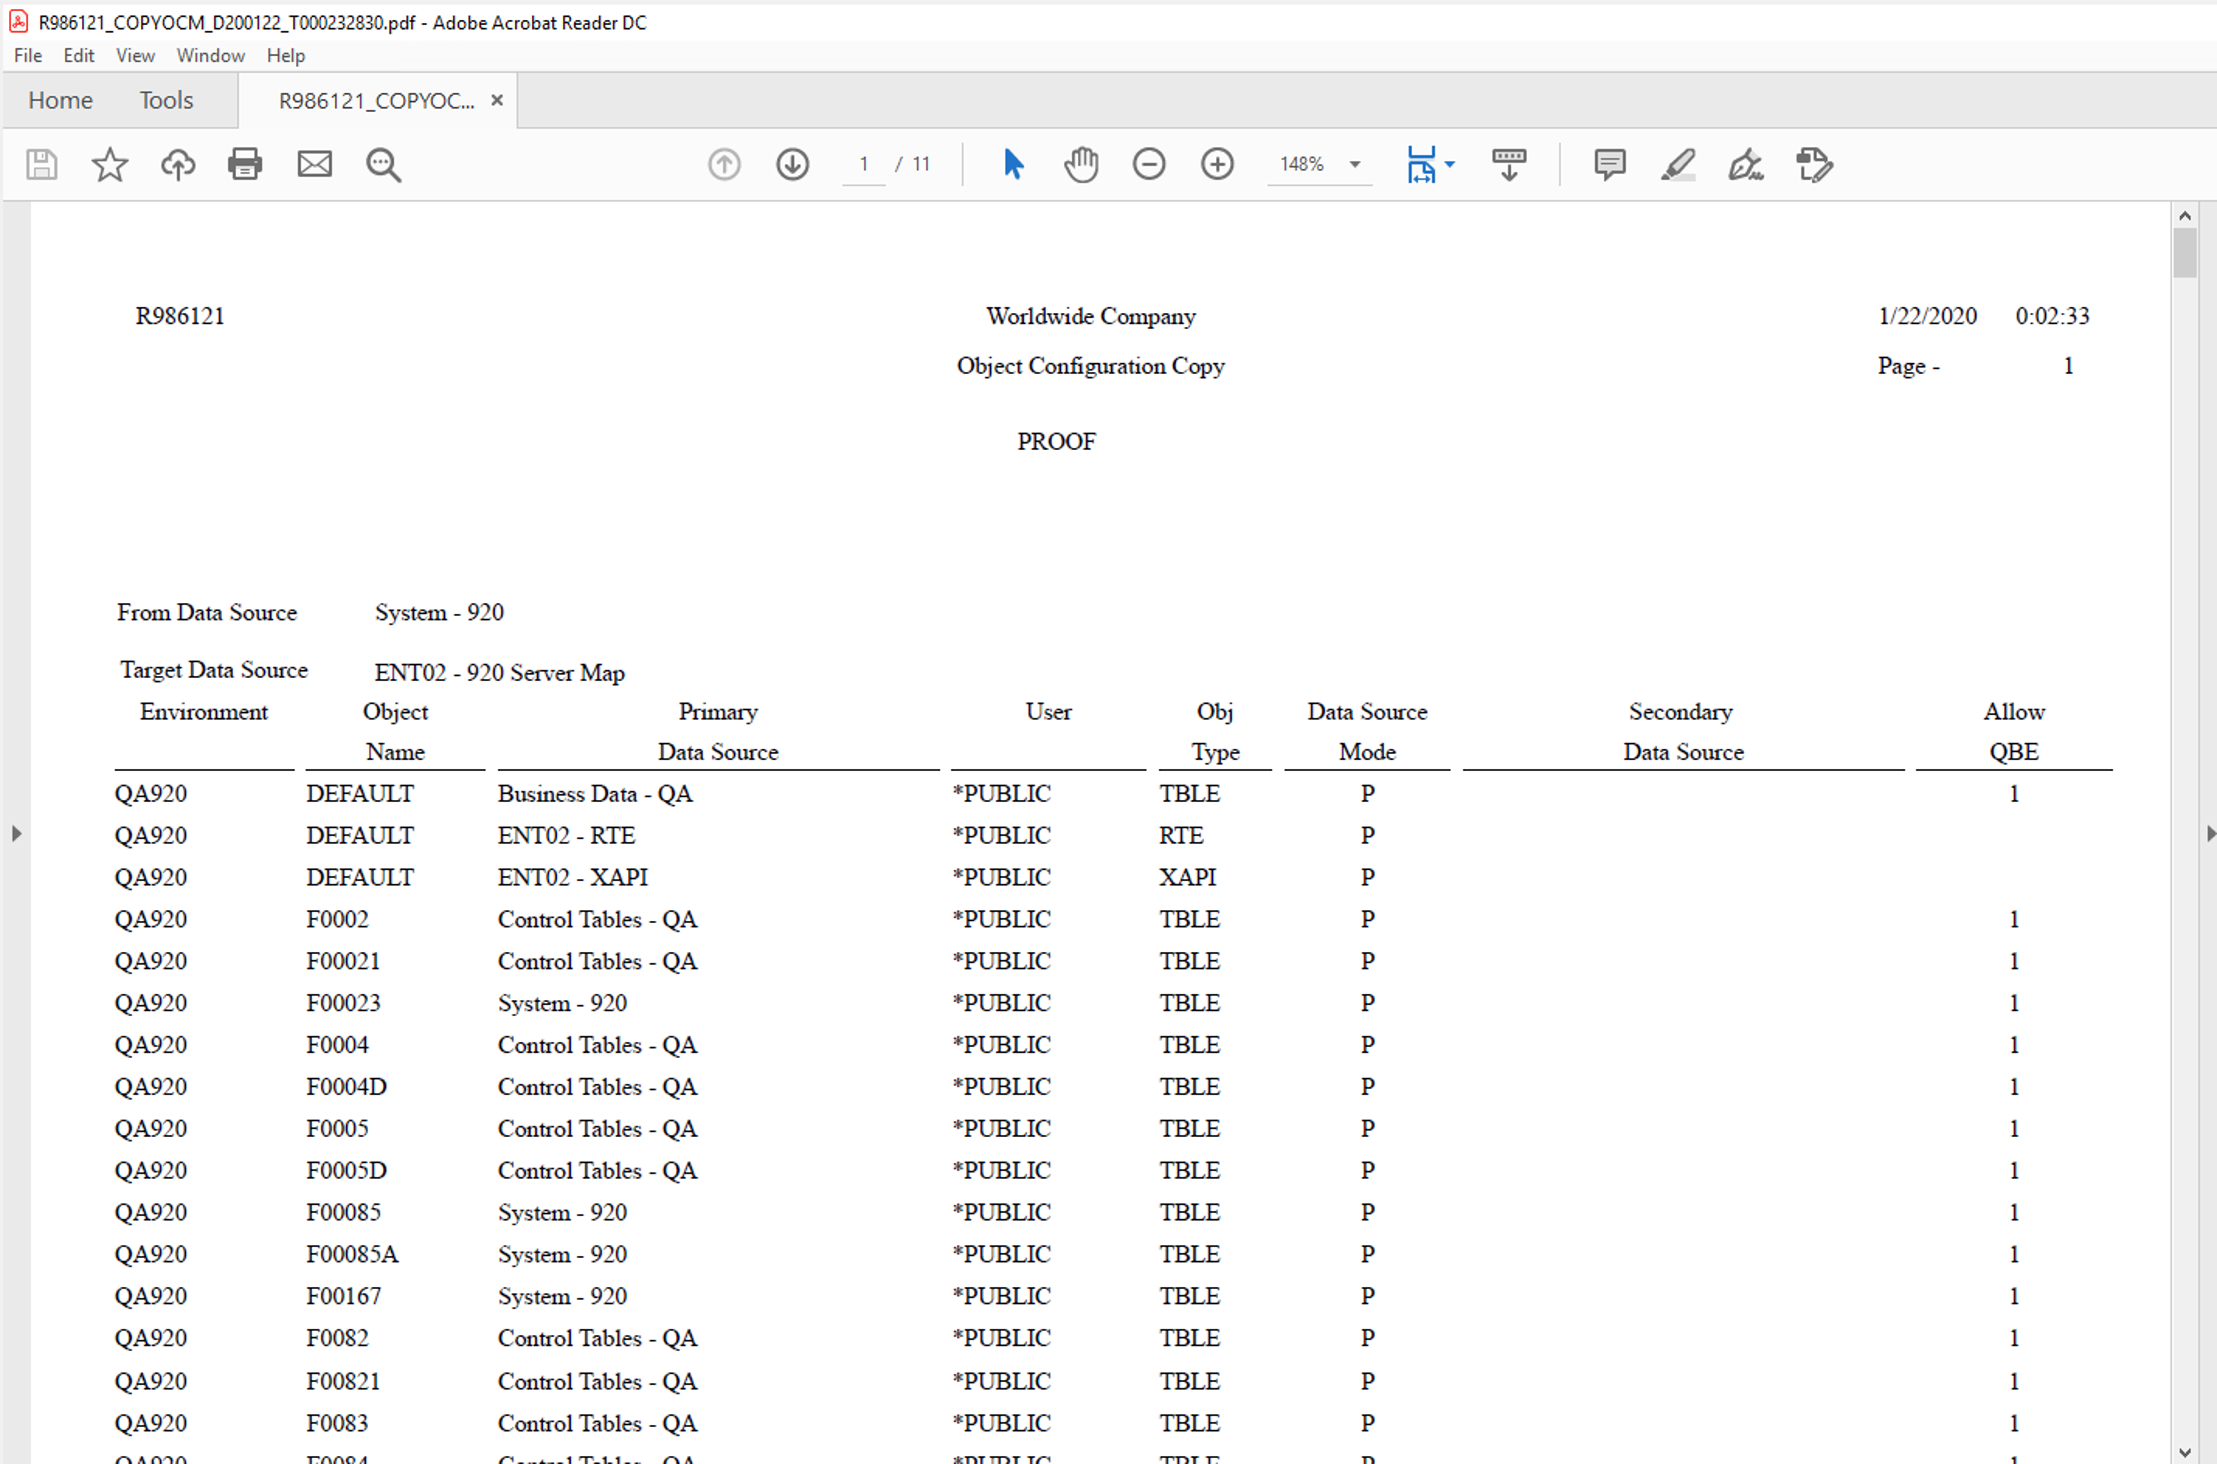
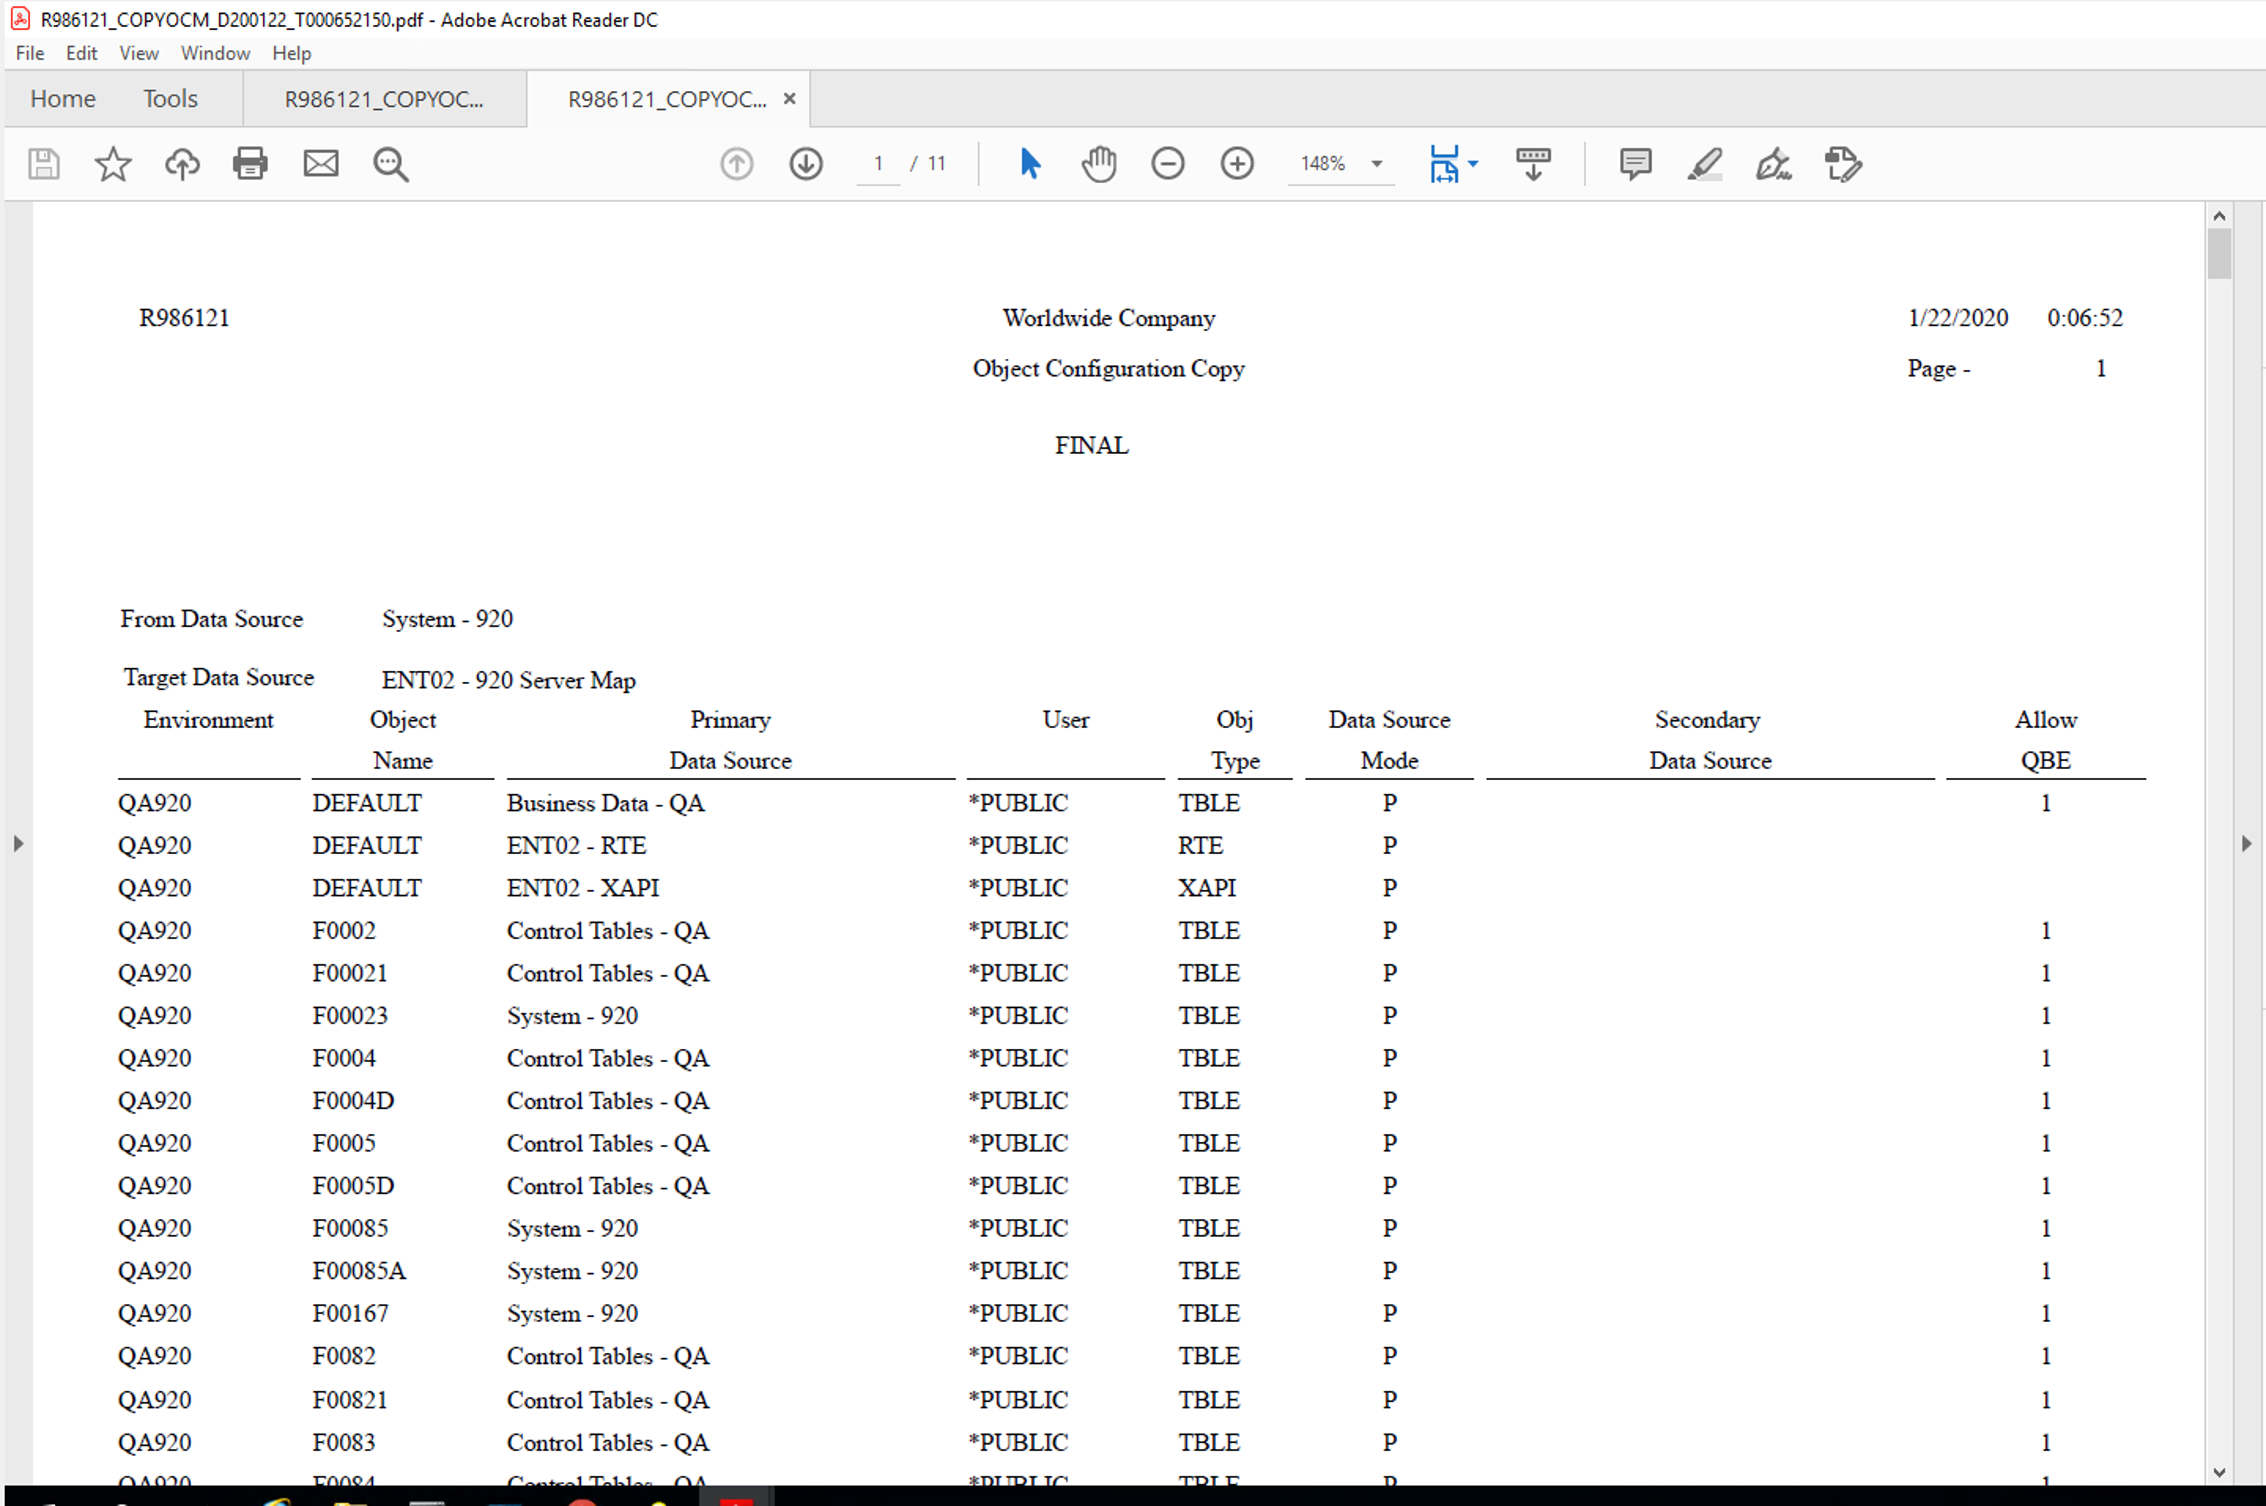
Run the R98611A, submitting to LOCAL from the fat client.
NOTE: Run it in Proof Mode first to see what it’s going to do.
Run with these Processing Options set to Final Mode to actually update the Server Map table:
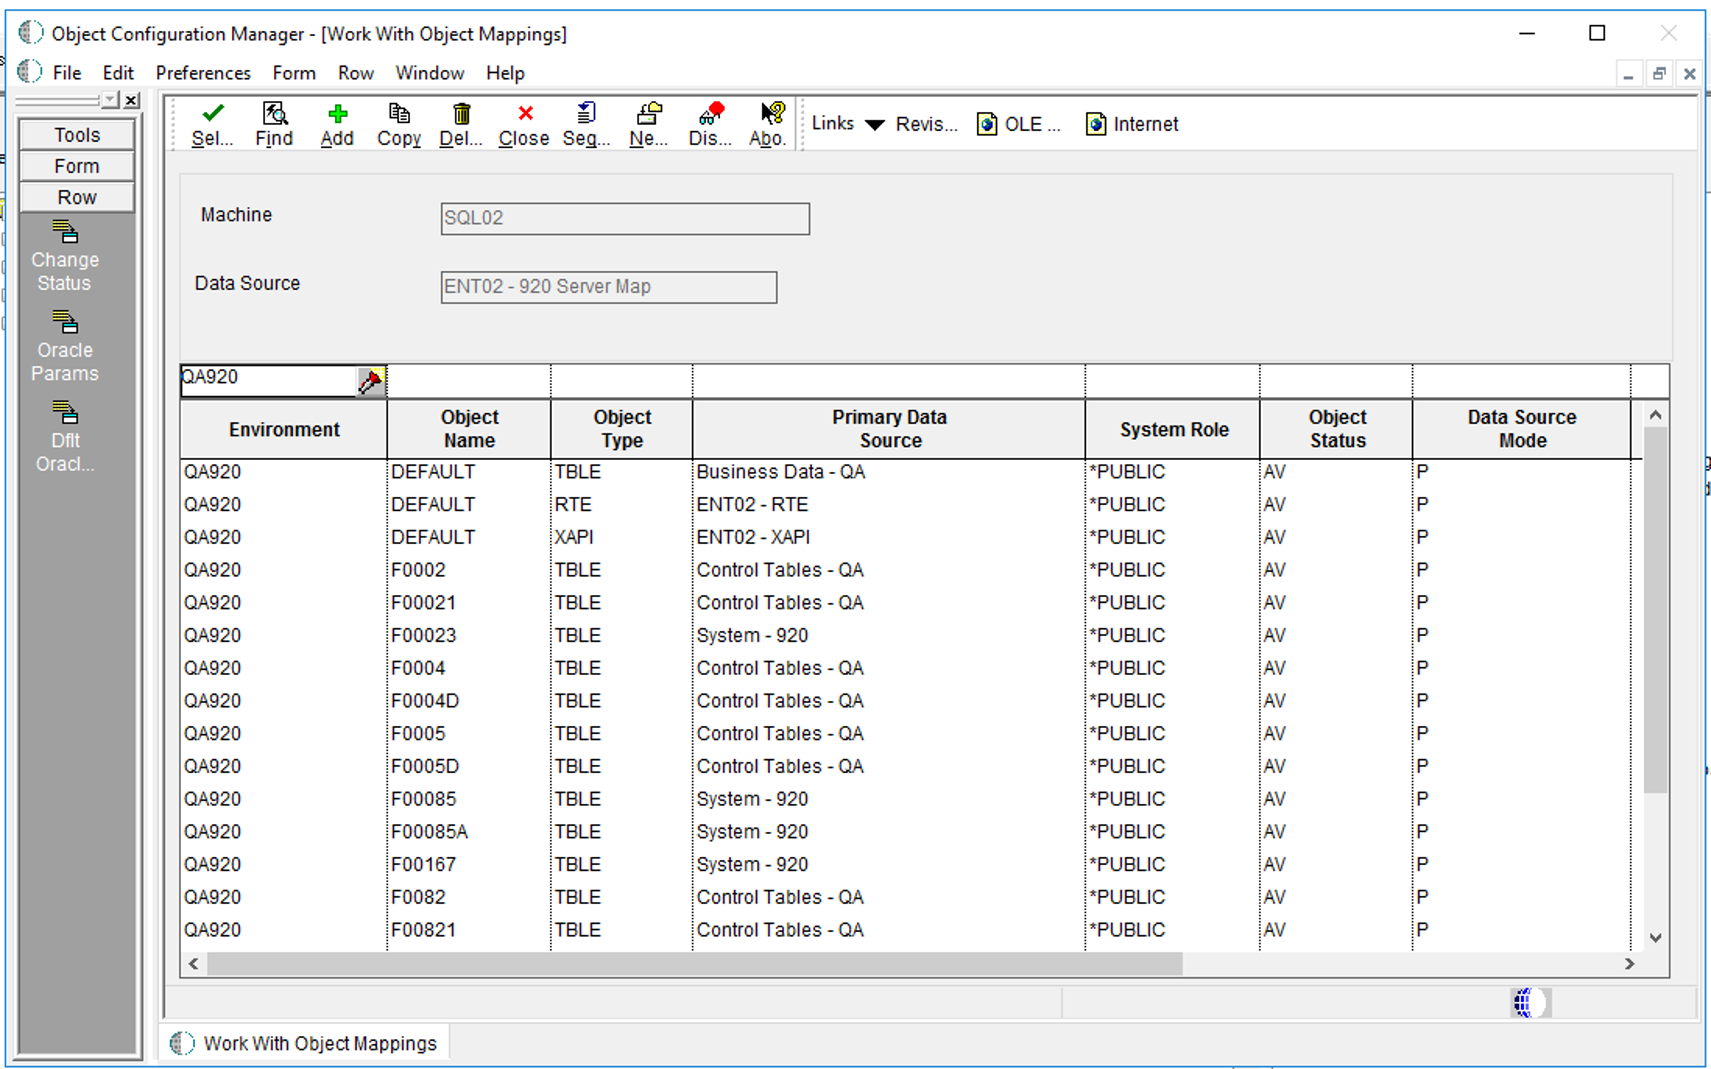
Check Server Map OCMs to make sure the new environment has records:
You’ll need to restart your Enterprise server to see those new OCM’s and Data Sources.
You will need to log out and back in on a fat client with the PY pathcode already installed (if you’re sharing the PY pathcode with both PY and QA environments).
8) Create a new JAS instance for the new environment
For JAS usage, setup a new JAS instance for the JQA environment. You’ll have caching issues if you try to use the same JAS server for two different environments with two different sets of Business Data / Control Tables. Therefore, a new JAS instance is the better solution for running this new environment.
If you found this post on creating a new environment in JD Edwards helpful, see our Top 4 Strategic Priorities for JD Edwards Users