
Business Scenario
We are all familiar with clearing cache after a Security or a UDC code change. Historically this has been a task that needed to be completed by the System Administrator through Server Manager. Starting on Tools Release 9.2.3.3 (GA April 2019), clearing cache (among other Server Manager tasks) can be executed through a RESTful web service enabling Orchestrator to do the work.
In this tutorial you will learn the steps to configure an orchestration to clear cache and how to execute the orchestration from within EnterpriseOne. With this solution, clearing cache will be a matter of pushing a button.
Solution
1. Create a Connection
Create an Open API Connection to expose the list of API calls available for Server Manager.
- From the Orchestrator Studio homepage, click the “Connections” icon
- From the Connections page, click “New” and select “Open API”
- Complete the following information:
- Name
- Description
- User/Role
- Environment
- Service Information
For “Service Information” use the following URL: https://server_manager_console_host:port/manage/mgmtrestservice/v1/open-api-catalog
Replace “server_manager_console_host:port” with your Host and Portal information.
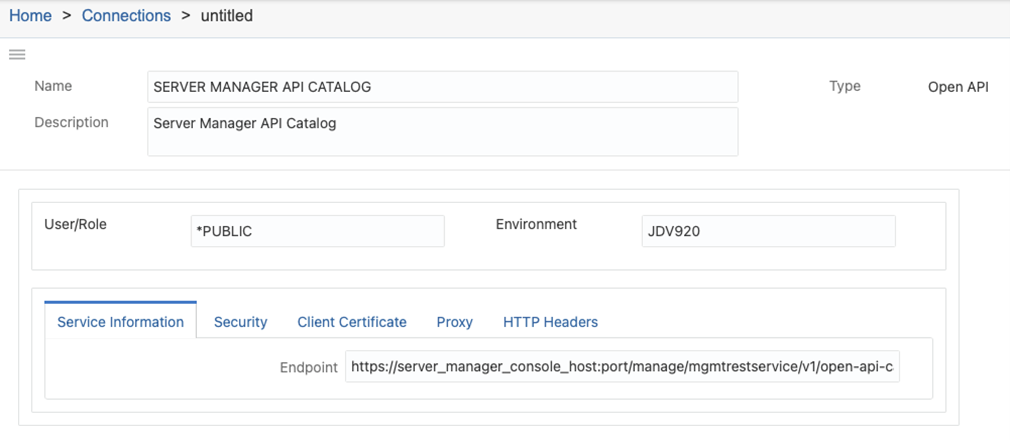
Note: The URL displayed above may vary depending on the Tools Release and Orchestrator Studio Version.
- Click the “Security” tab and provide credentials for a user with access to Server Manager using the “Basic Authorization” security policy
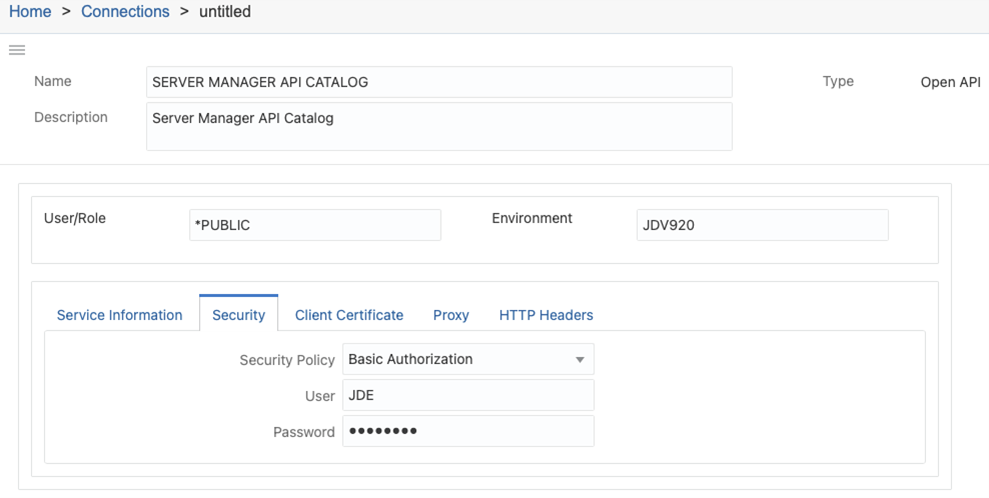
- Click “Save” to save the component
Note: Connection is a soft-coding configuration therefore a single record is enough for all environments. As the connector gets promoted to the next environment, the needed soft coding will be created accordingly. You can see this behavior using the P954000 application after promotion.
2. Create a Connector
This Connector Service Request will allow you to select the specific API for the task at hand (Clear Cache).
- From the Orchestrator Studio homepage, click the “Connectors” icon
- From the Connectors page, click “New” and select “Open API”
- Complete the following information:
- Name
- Description
- Open API
For the “Open API” value, if the Connection was successfully configured, you will be able to select the record created in Step 1.
Once you select the “Open API” value, complete the following information:
- API: Select “/clearjdbjdatabasescaches” from the dropdown
- HTTP Method: Select “DELETE”
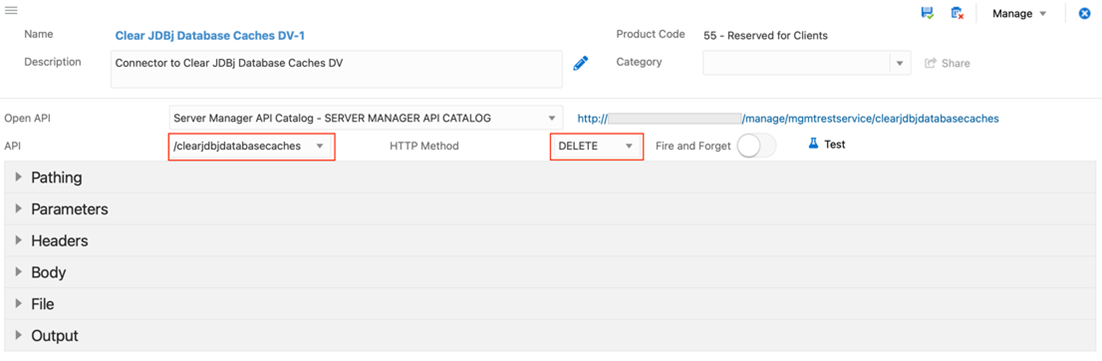
- Click “Headers” and complete the following using the drop-down menus for each value:

- Click “Body” and enter the following the string:
{ "instanceName" : "JAS_DV920", "jdbjDatabaseCacheName" : "ALL"}
Replace “JAS_DV920” with the name of your JAS WEB Instance.

- Click “Save” to save the component
- After saving the component, click “Test” to verify the service. If successful, the following message will be displayed:
{"message": "Server returned HTTP response code: 204"}

3. Create an Orchestration
- From the Orchestrator Studio homepage, click the “Orchestrations” icon
- From the Orchestrations page, click “New”
- Complete the following information:
- Name
- Description
- Click the “+” icon to add the Connector Service Request created in Step 2
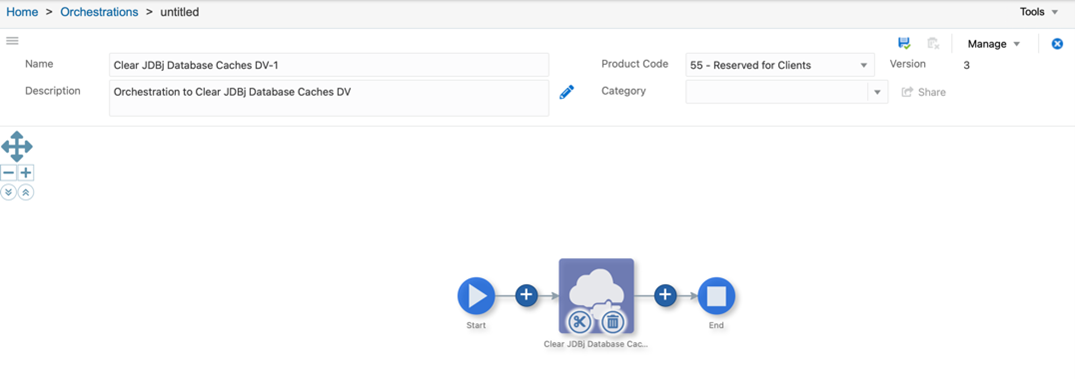
- Click “Save” to save the component
- Run the orchestration from Orchestrator to confirm the process. After running it, login to Server Manager to confirm the Cache has been cleared.
4. Create a Form Extension to Call the Orchestration from EnterpriseOne
For purpose of the tutorial, we are going to use the Work With Servers application P986116|W986116A. This application/form can be secured so that only certain individuals (roles) can access the orchestration.
- Login to E1 and open a Work With Submitted job
- From the application, click on the “Advanced” form exit. This will take you to the P986116|W986116A “Work With Servers” application
- From the application, click on the “Form Extension” icon
- From the “Form Extension Manager” drag-drop an “Add Button” icon onto the form
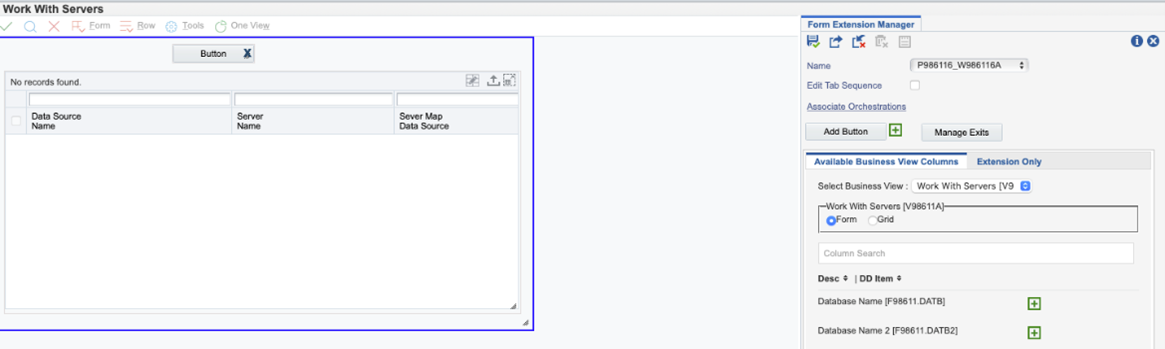
- Relabel the new button accordingly (i.e. Clear Cache DV)
- Next, associate the Orchestration created on Step 3 to the button, running it synchronously
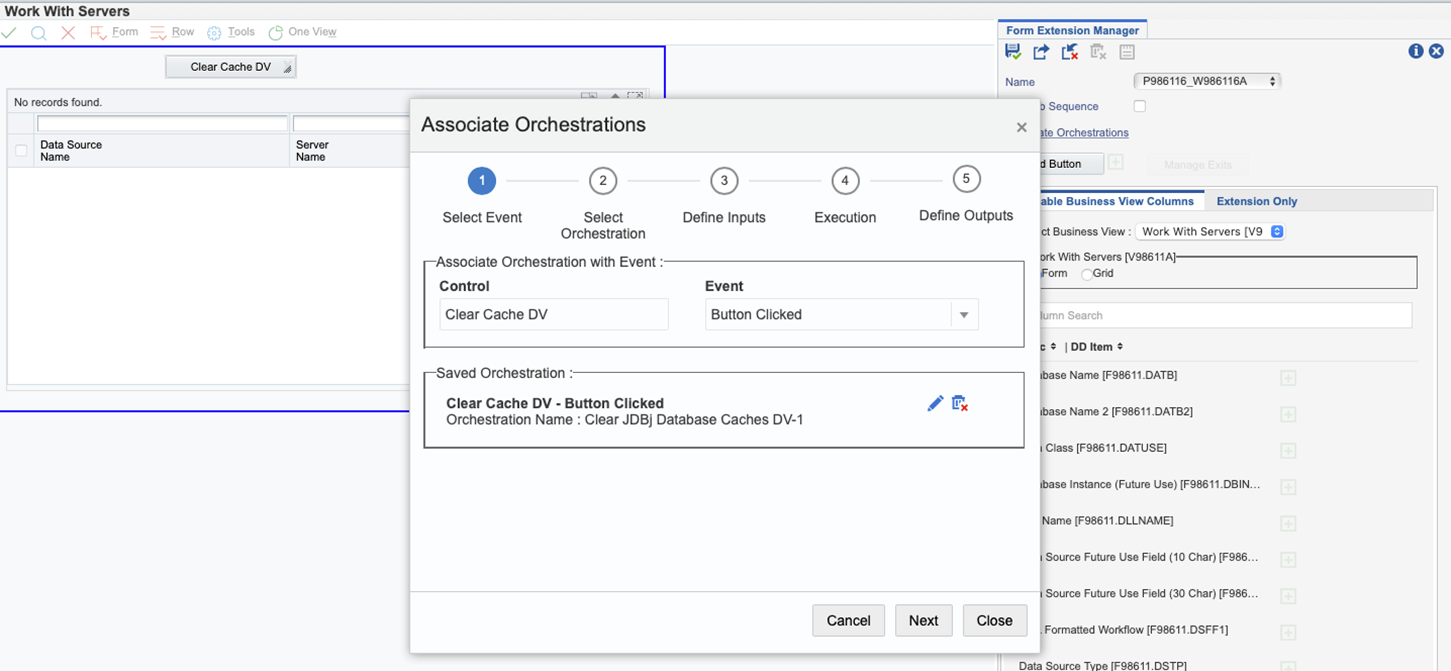
- Save the Form Extension
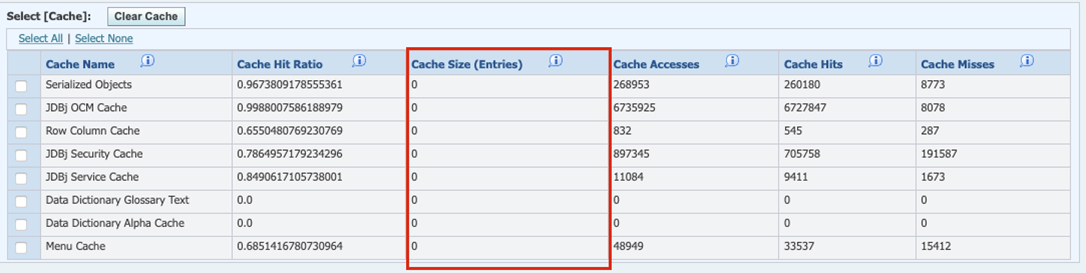
- Test the new button. After running it, login to Server Manager to confirm the Cache has been cleared
- Proceed sharing all UDO components with the appropriate users and roles
Conclusion
By using the configuration described in the above tutorial, users can easily clear cache without using Server Manager. This can help alleviate the need for a CNC to clear cache when a business user makes a change to the application that requires it, such as Security and/or User Defined Code changes.