One of the biggest differences between traditional OMW on the fat client and promotion of UDOs on the web is that there are two new applications that run on the web that must be utilized to manage UDO’s:
- P98220W – Web Object Management Workbench
- P98220U – Work with User Defined Objects
P98220W can be used to create projects, add UDOs to projects, import UDOs into E1, check-out, get the token, check-in UDOs, share/publish UDO’s within the project, etc.
P98220U is an application that is used to manage the status and publication of individual UDOs. It allows an administrator to share or ‘publish’ a UDO created by one user so other users can view and/or use it, assuming security is open for that UDO.
Before a project can be promoted, or shared, via P98220W, it is necessary that the token is owned by the user’s project.
When a user creates a UDO, the object is automatically added to their Default Project. No additional action is necessary to acquire the token.
If, however, a user is attempting to work with a UDO that was created by another person, it is necessary to acquire the token for the object in order to be able to perform additional actions on that UDO.
To acquire the token, locate specific information about the object by logging into a web URL and access P98220U – Work with User Defined Objects:

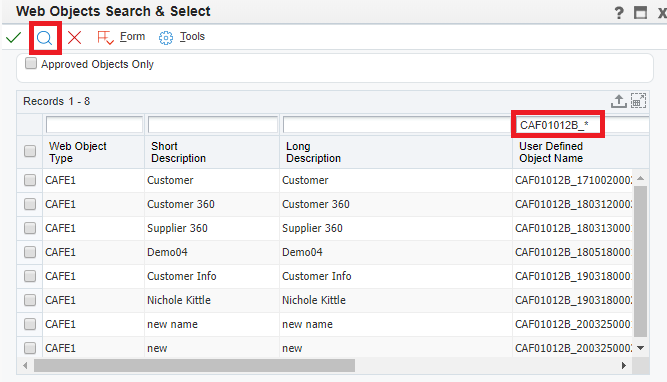
Find the UDO in question, in this case the short description is “new”, and note the User Defined Object Name – CAF01012B_2003250001CUST.
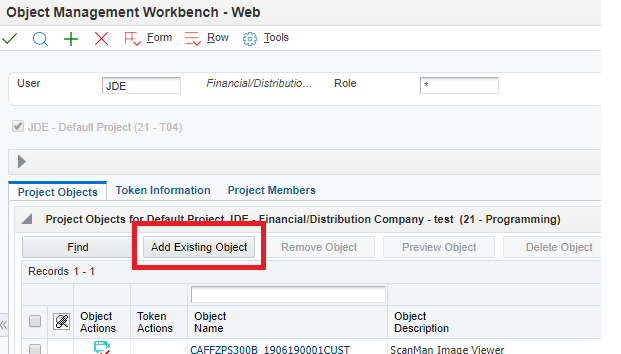
Go into P98220W – Web Object Management Workbench, select the project you want the UDO to be included in, or create a new project, and choose “Add Existing Object” from the bottom grid:
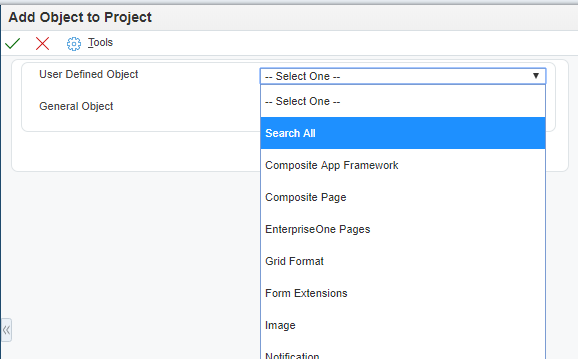
Choose from an extensive list of UDO types or select “Search All”.
General Object prompt can usually be left blank.
Then select green checkmark to view all objects of this type of UDO.

In “Web Object Search and Select”, input UDO name from P98220U and then click the Visual Assist (magnifying glass) to locate object:
Select the record by putting a check mark in the box on the line for that object and then click the green checkmark button.
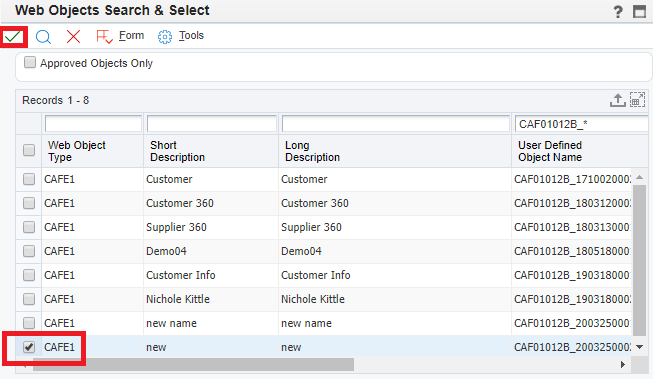
That will add the UDO to the project. Now, you can request token by clicking on Token Information > Request Token.


If the object has already been checked-in, you can get the token by choosing Select One > Check out/Reserve.
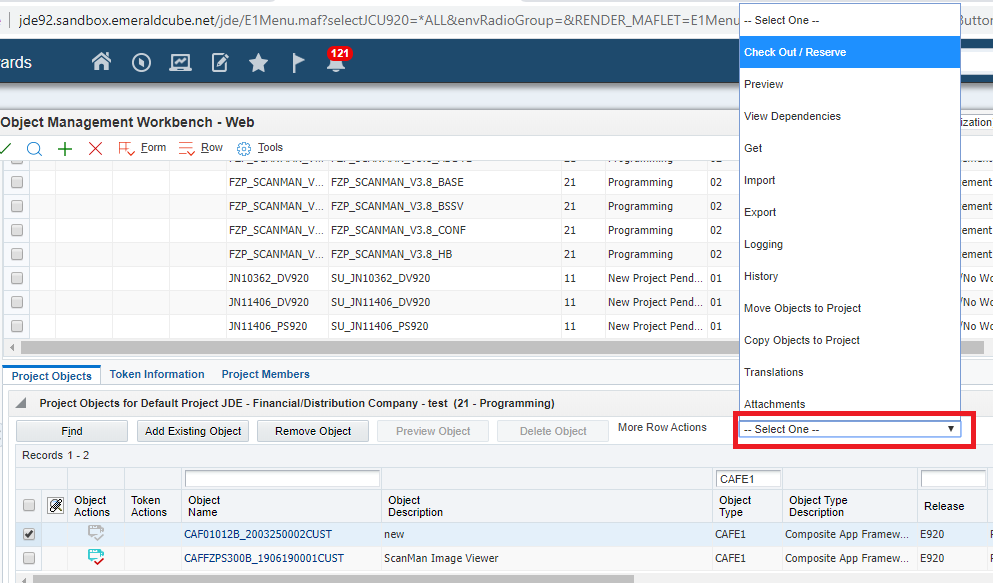
It will show at this point if another project already has the token for that object and will ask if you want to queue for that token.
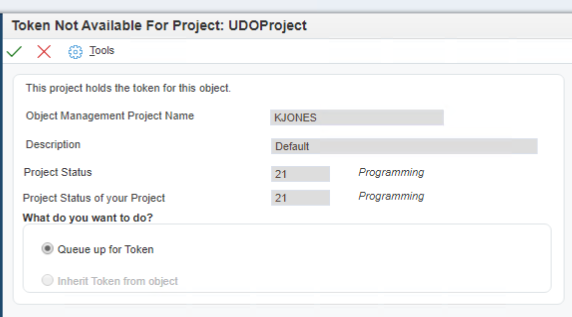
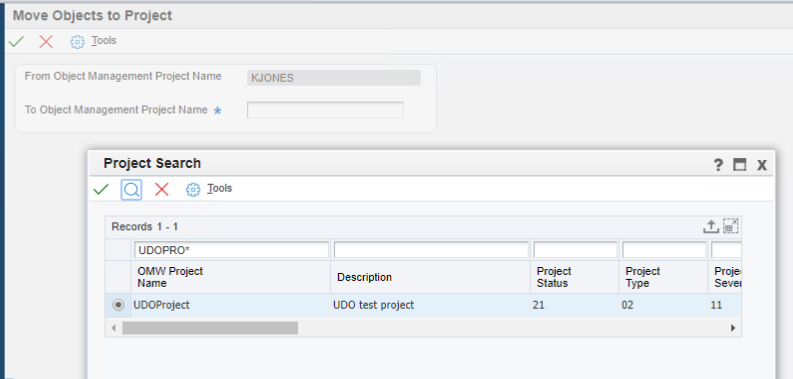
If this happens, you’ll need to have the owner of the project – in this case the default project – with the token, ‘Request to Publish’, which changes the status to 05 – Pending Approval, and a user with permissions can ‘Approve / Share’ that object through P98220U, or they can ‘Check In / Approve / Share’ or ‘Move Objects to Project’ if they have that ability.

Move Object to Project will bring up a Project Search form to allow a project to be selected to move the object in to.
At that point, you can work with the UDO object and when ready, check it in – with ‘Check in / Approve / Share’ – which will publish the object for others to see and/or us, or ‘Check in / Approve and Reserve’ – which will keep the token, or do any of the other steps in this list of options:
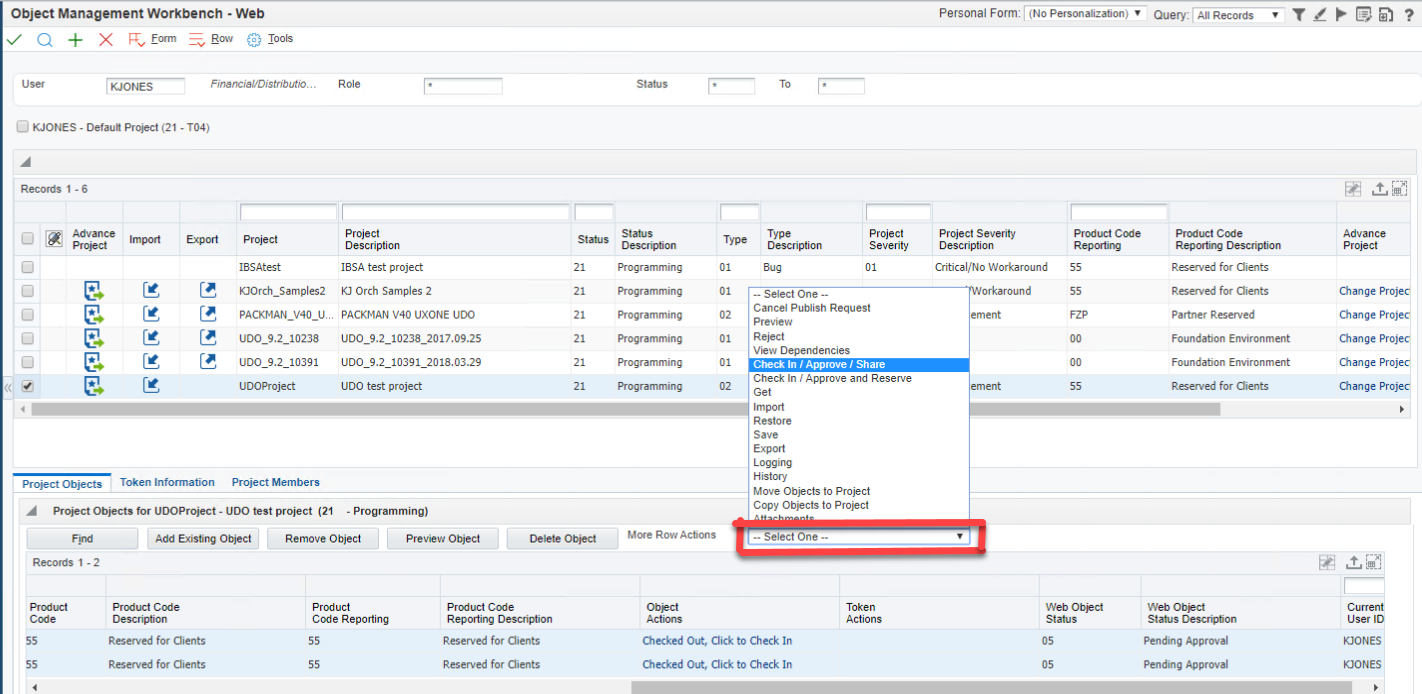
If you ‘Check In / Approve and Reserve’, the objects will be Shared for *PUBLIC but this project will still have the token and be able to Edit the objects. P98220U shows the *PUBLIC Shared objects:

P98220W shows the objects in Editing status for this project:

‘Check In / Approve / Share’ shows the objects as Shared – status 08, but the project still holds the token:

To release the token, the owner of the project would need to either click the link to ‘Release Token’ in the grid, or use the drop down to ‘Release Token’:


